Search > Autocomplete > 콘솔 사용 가이드
알아두기
- 문서 내의 앱키 'PyVTgcSXJpA3e5U7'는 사용자별로 다릅니다.
시작하기
먼저 Autocomplete 서비스를 활성화합니다.
-
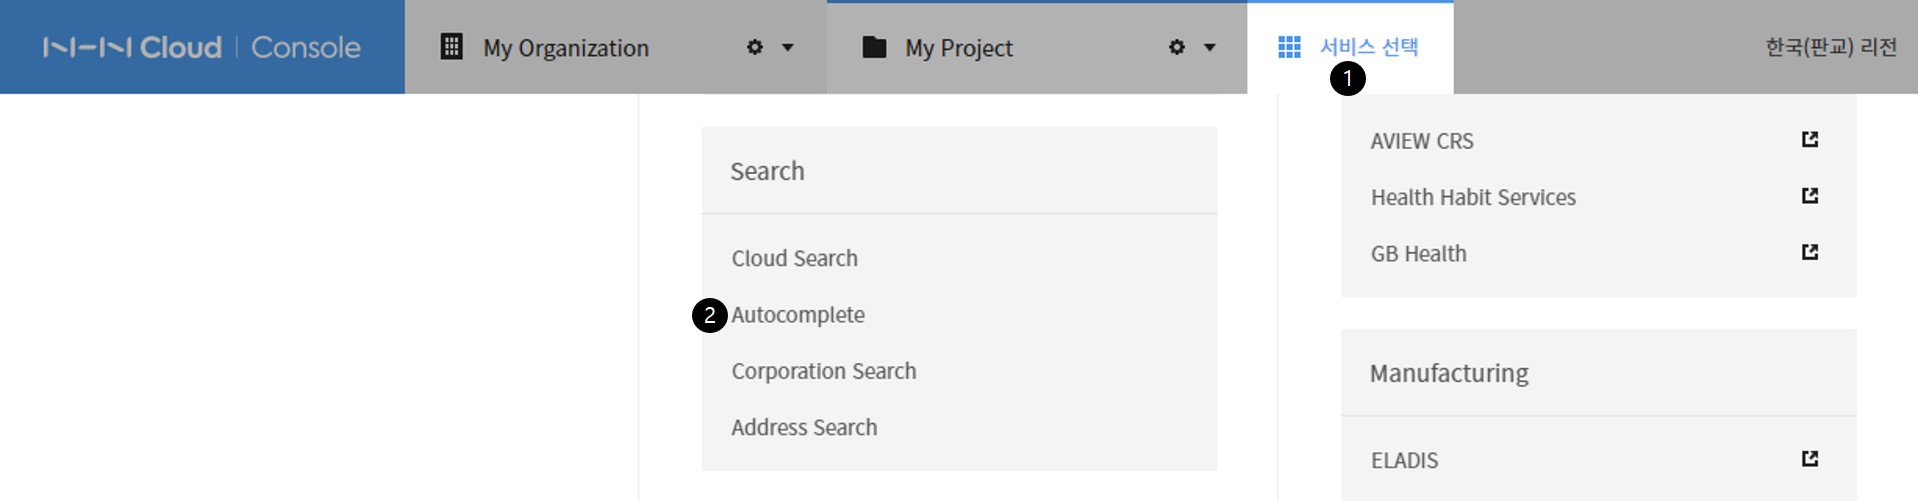
NHN Cloud Console에서 서비스 선택을 클릭합니다.
-
Autocomplete을 클릭합니다.
서비스가 활성화되었는지 확인하는 방법은 다음과 같습니다.
-
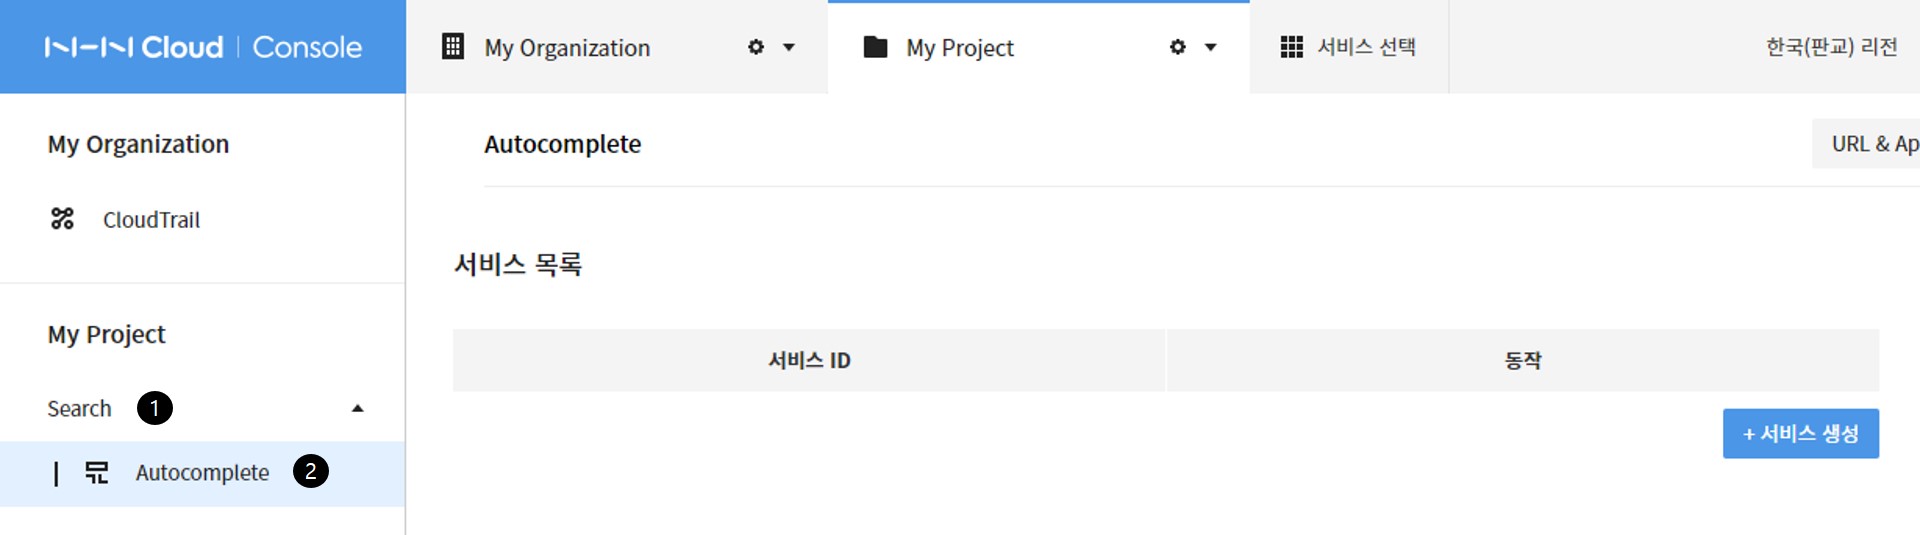
NHN Cloud Console 왼쪽 메뉴에서 Search를 클릭합니다.
-
Autocomplete가 보이면 서비스가 활성화된 것입니다.
기본 사용법
1. 서비스 생성
-
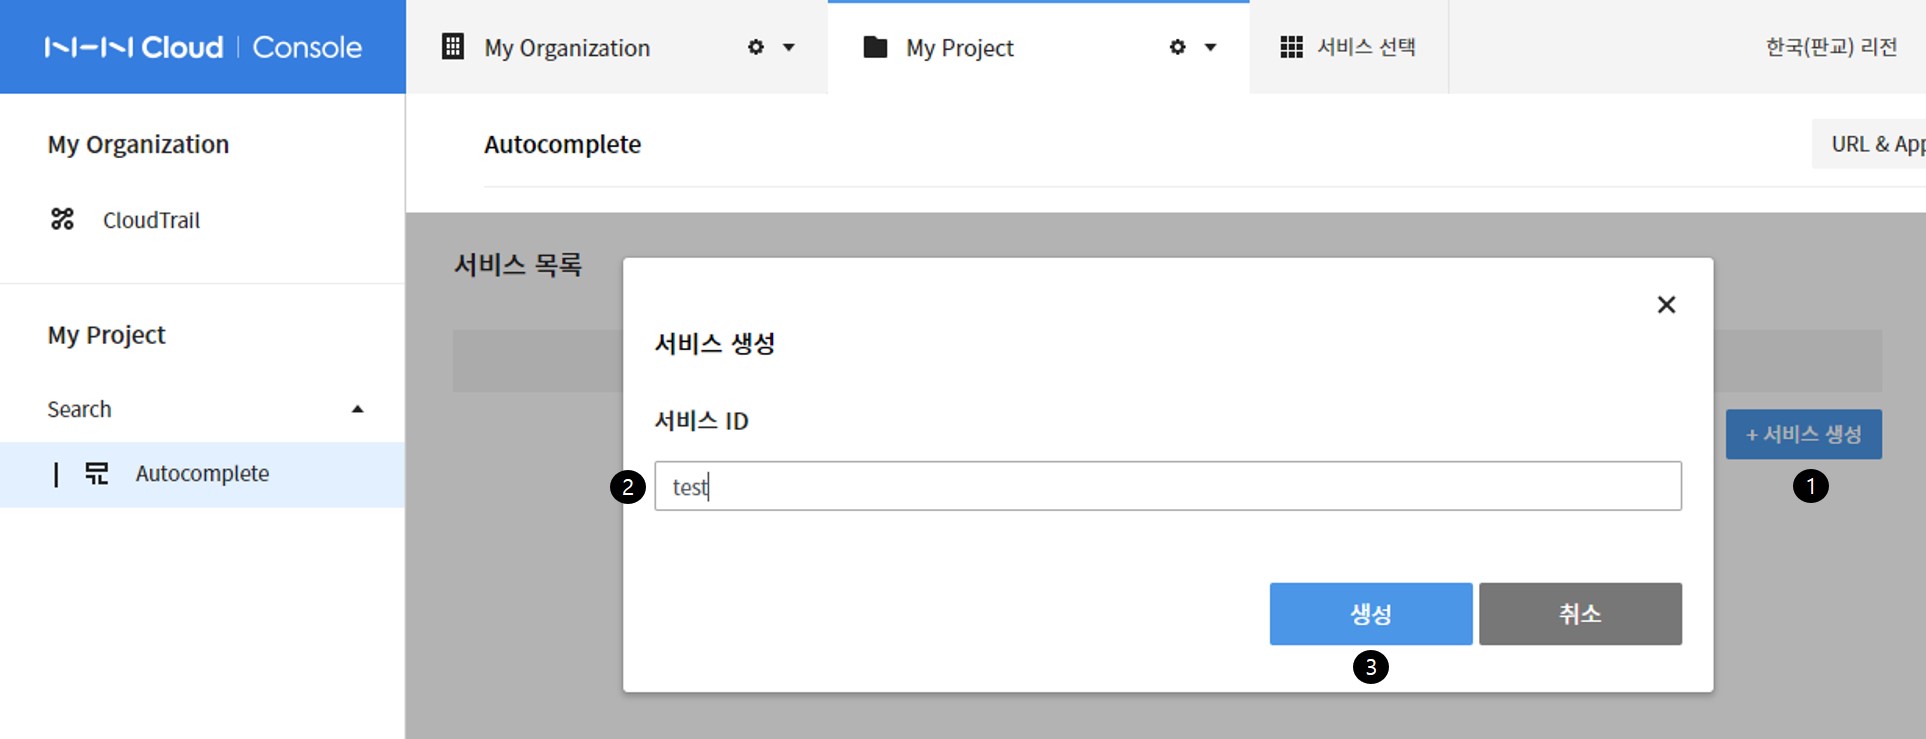
서비스 생성 버튼을 클릭합니다.
-
서비스 생성 창에서 서비스 ID를 입력합니다.
- 영어 소문자, 숫자 및 _(밑줄)과 -(하이픈)만 사용할 수 있습니다.
- 숫자, _(밑줄), -(하이픈)로 시작할 수 없습니다.
- 최소 두 글자 이상 가능합니다.
-
저장 버튼을 클릭합니다.
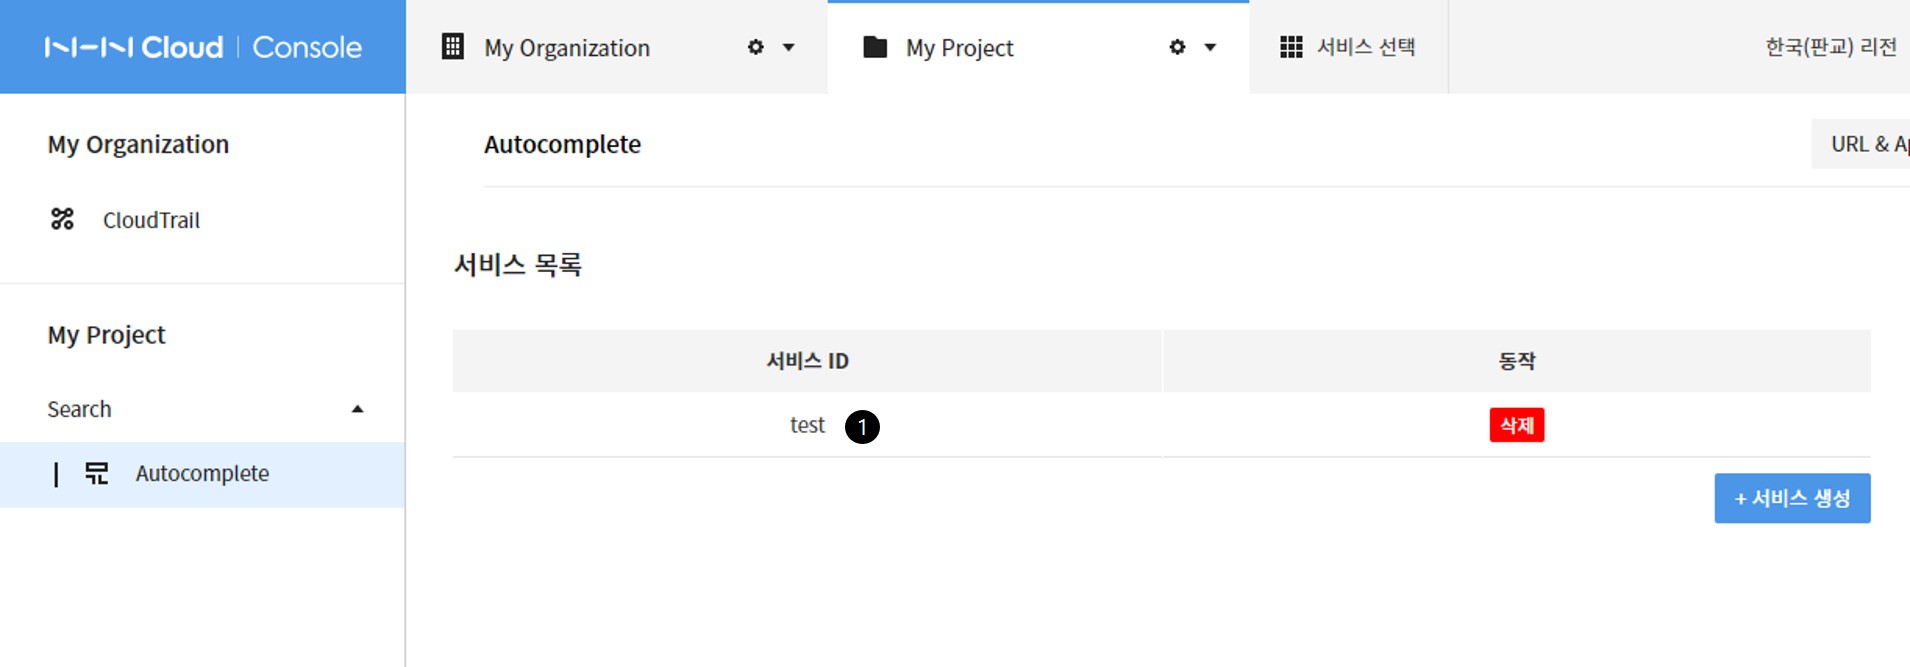
생성된 서비스 결과를 확인합니다.
1. 생성된 서비스 ID(test)를 클릭합니다.
2. 색인
색인할 파일을 생성하고 색인하는 방법은 다음과 같습니다.
색인 파일 생성
- 아래 예제와 같은 형식으로 색인 요청 파일을 생성합니다.
- 색인할 파일은 UTF-8로 생성해야 합니다.
- Windows 메모장에서 파일 저장 시 인코딩을 UTF-8로 지정해서 저장합니다.
- 예제에서는 data/documents.json 이름으로 생성했습니다.
- 최대 파일 크기는 10MB입니다.
[
  {
    "input": "나이키",
    "weight": 3
  },
  {
    "input": "나이키 운동화",
    "weight": 2
  },
  {
    "input": "운동화",
    "weight": 1
  }
]
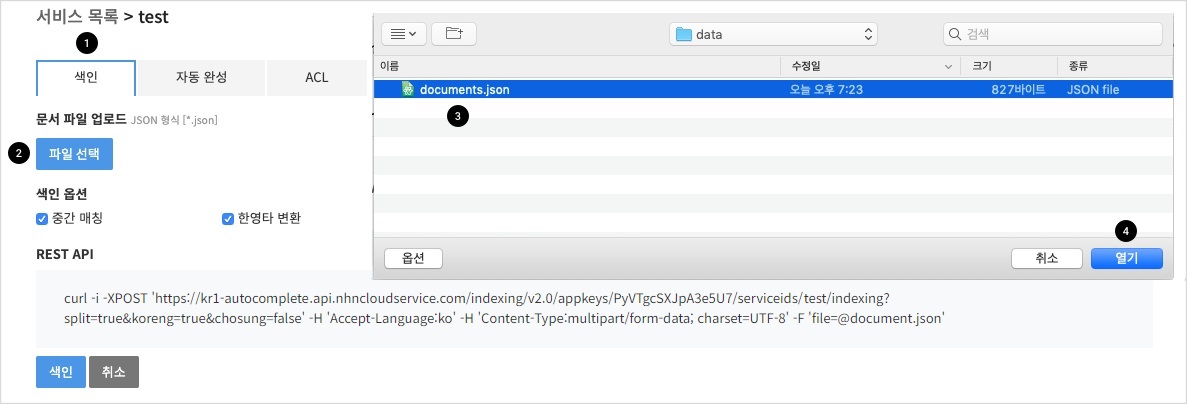
색인 방법
-
색인 탭을 클릭합니다.
-
파일 선택 버튼을 클릭합니다.
-
색인할 파일을 선택합니다.
-
열기 버튼을 클릭합니다.
-
색인 명령어가 REST API로 출력됩니다.
-
색인 버튼을 클릭합니다.
-
새로 고침 버튼을 클릭합니다.
-
색인 결과를 확인합니다.
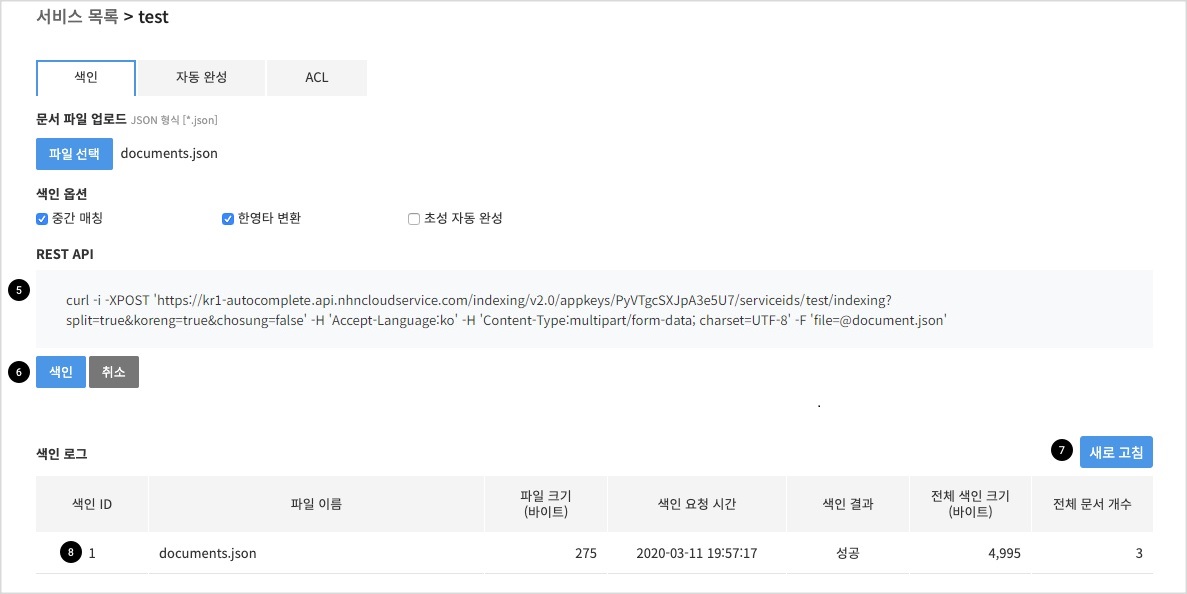
색인 주의 사항
색인을 요청하면 기존 데이터는 모두 삭제되고 신규 데이터로 교체됩니다.
REST API
-
색인 API
-
Request
-
파일 업로드 방식
curl -XPOST 'https://kr1-autocomplete.api.nhncloudservice.com/indexing/v2.0/appkeys/PyVTgcSXJpA3e5U7/serviceids/test/indexing?split=true&koreng=true&chosung=false' -H 'Accept-Language:ko' -H 'Content-Type:multipart/form-data; charset=UTF-8' -F 'file=@documents.json' -
Payload 방식
curl -i -XPOST 'https://kr1-autocomplete.api.nhncloudservice.com/indexing/v2.0/appkeys/PyVTgcSXJpA3e5U7/serviceids/test/indexing?split=true&koreng=true&chosung=false' -H 'Accept-Language:ko' -H 'Content-Type:application/json; charset=UTF-8' -d '
[
  {
    "input": "나이키",
    "weight": 3
  },
  {
    "input": "나이키 운동화",
    "weight": 2
  },
  {
    "input": "운동화",
    "weight": 1
  }
]'
-
-
Response
{
  "id" : 1
}
-
-
색인 결과 확인 API
-
Request
curl -i -XGET 'https://kr1-autocomplete.api.nhncloudservice.com/indexing/v2.0/appkeys/PyVTgcSXJpA3e5U7/serviceids/test/indexing_log?id=1' -H 'Accept-Language:ko'- id 1은 위의 색인 API Response 의 id입니다.
-
Response
{ "request_time" : "2017-10-23T12:36:43", "file_name" : "documents.json", "file_size" : 114, "status" : 4 }- status
- 1 : 대기 중
- 2 : 무시됨
- 3 : 진행 중
- 4 : 성공
- 5 : 실패
- 6 : 취소
- status
-
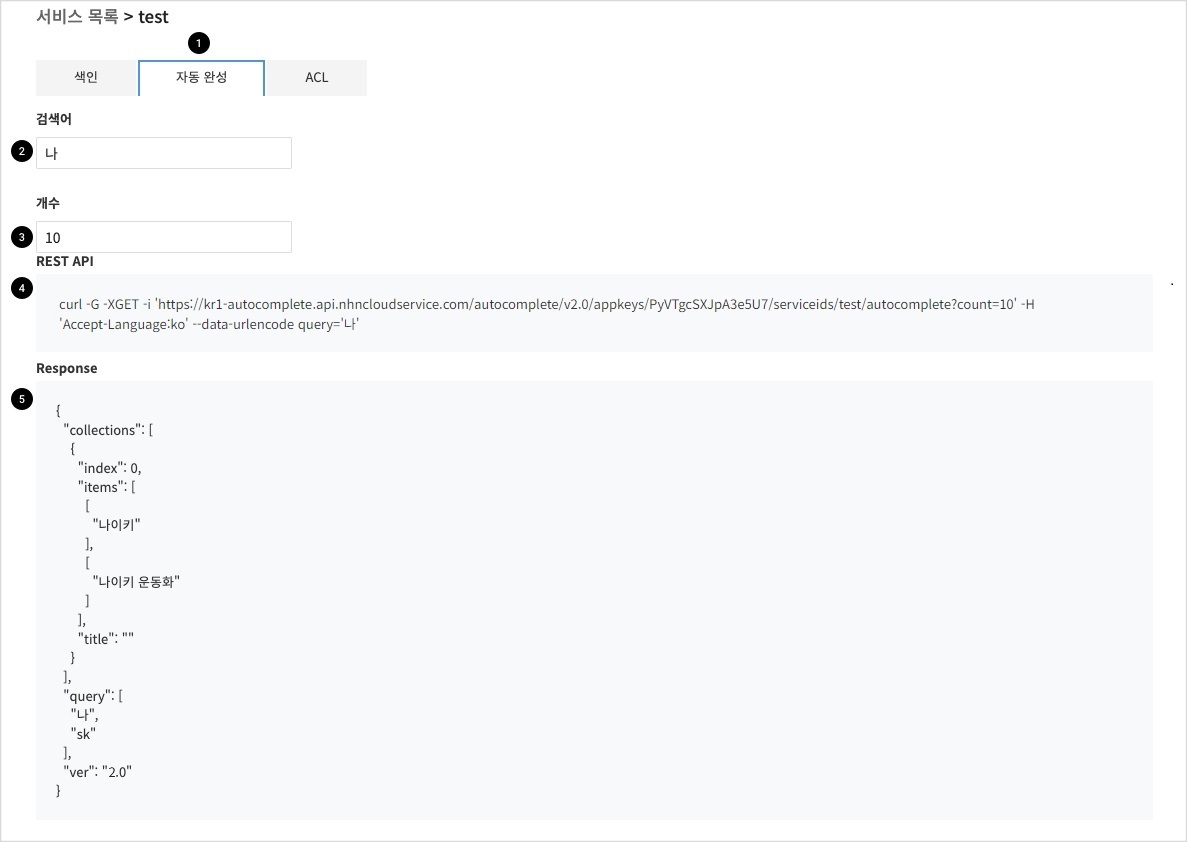
3. 자동 완성
자동 완성 방법
-
자동 완성 탭을 클릭합니다.
-
검색할 단어를 입력합니다.
-
출력 개수를 지정합니다.
-
자동 완성 REST API입니다.
-
자동 완성 결과가 출력됩니다.
REST API
-
Request
curl -G -XGET 'https://kr1-autocomplete.api.nhncloudservice.com/autocomplete/v2.0/appkeys/PyVTgcSXJpA3e5U7/serviceids/test/autocomplete?count=10' -H 'Accept-Language:ko' --data-urlencode query='나' -
Response
{
  "collections" : [
    {
      "index" : 0,
      "items" : [
        [
          "나이키"
        ],
        [
          "나이키 운동화"
        ]
      ],
      "title" : ""
    }
  ],
  "query" : [
    "나",
    "sk"
  ],
  "ver" : "2.0"
}
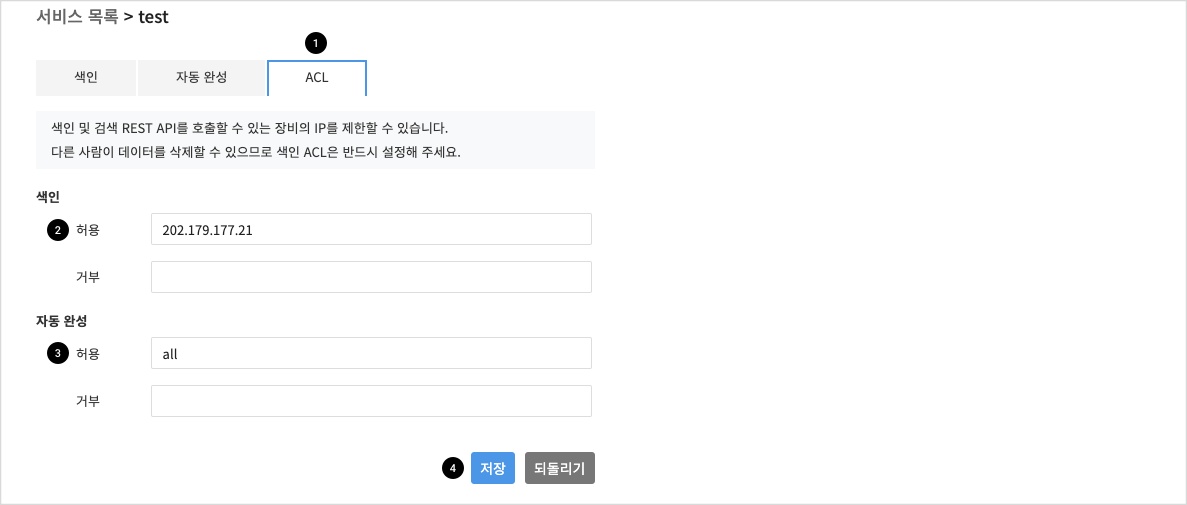
4. ACL
색인 및 자동완성 REST API를 호출할 수 있는 장비의 IP를 제한할 수 있습니다. 콘솔에서 테스트하는 경우 ACL 설정과 관련 없습니다.
ACL 설정 방법
-
ACL 탭을 클릭합니다.
-
색인 요청 IP 주소가 202.179.177.21 인 경우만 색인이 가능하도록 설정한 예제입니다.
-
자동완성 요청은 모든 IP에서 가능하도록 설정한 예제입니다.
-
저장 버튼을 클릭합니다.
기능 상세 설명
중간 매칭
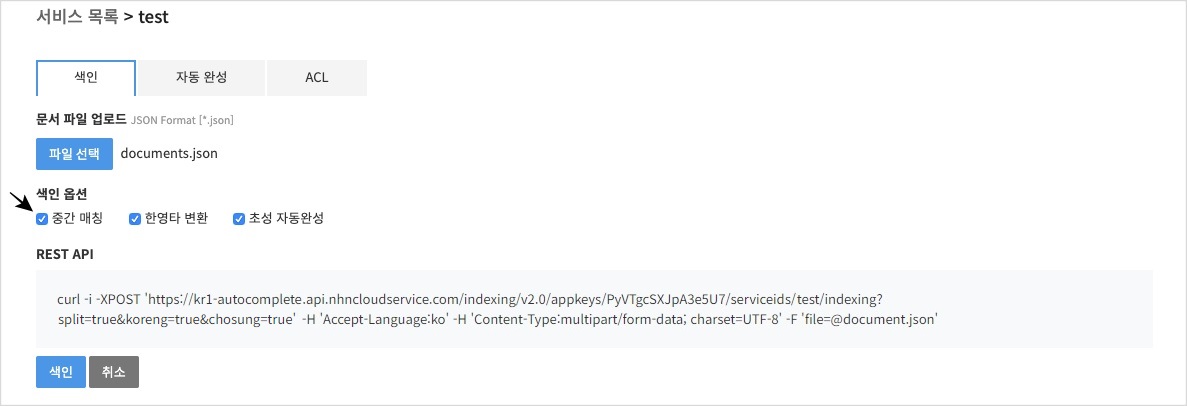
색인
테스트를 위해 아래 데이터를 색인합니다.
[
  {
    "input": "나이키운동화",
    "weight": 2
  },
  {
    "input": "아디다스 운동화",
    "weight": 1
  }
]
색인할 때 중간 매칭을 선택합니다.
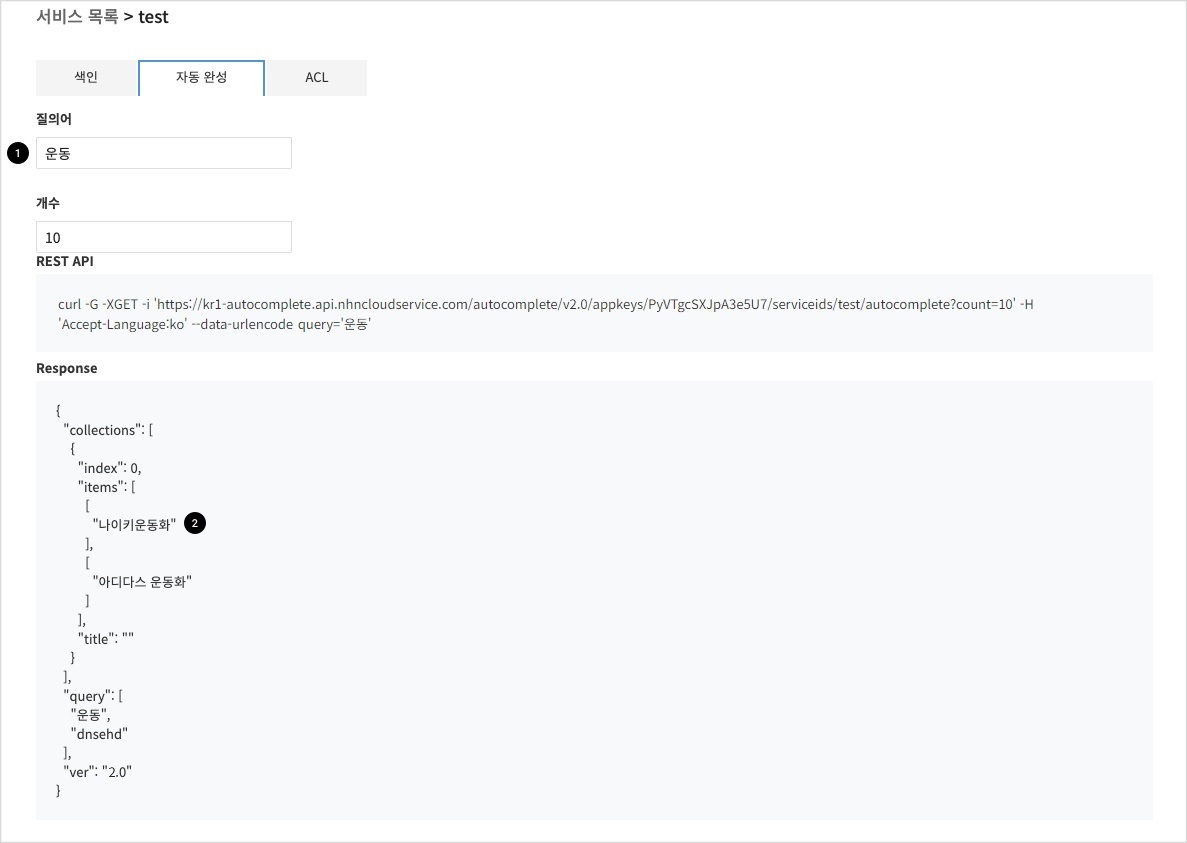
자동 완성
-
운동을 입력합니다.
-
중간에 운동으로 시작되는 나이키운동화가 출력됩니다.
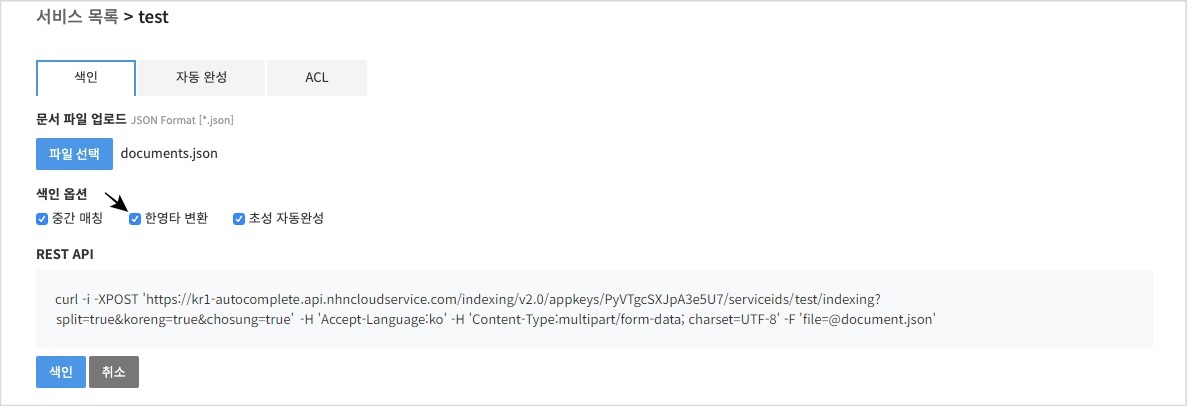
한영타 변환
색인
테스트를 위해 아래 데이터를 색인합니다.
[
  {
    "input": "나이키",
    "weight": 2
  },
  {
    "input": "아디다스",
    "weight": 1
  }
]
색인할 때 한영타 변환을 선택합니다.
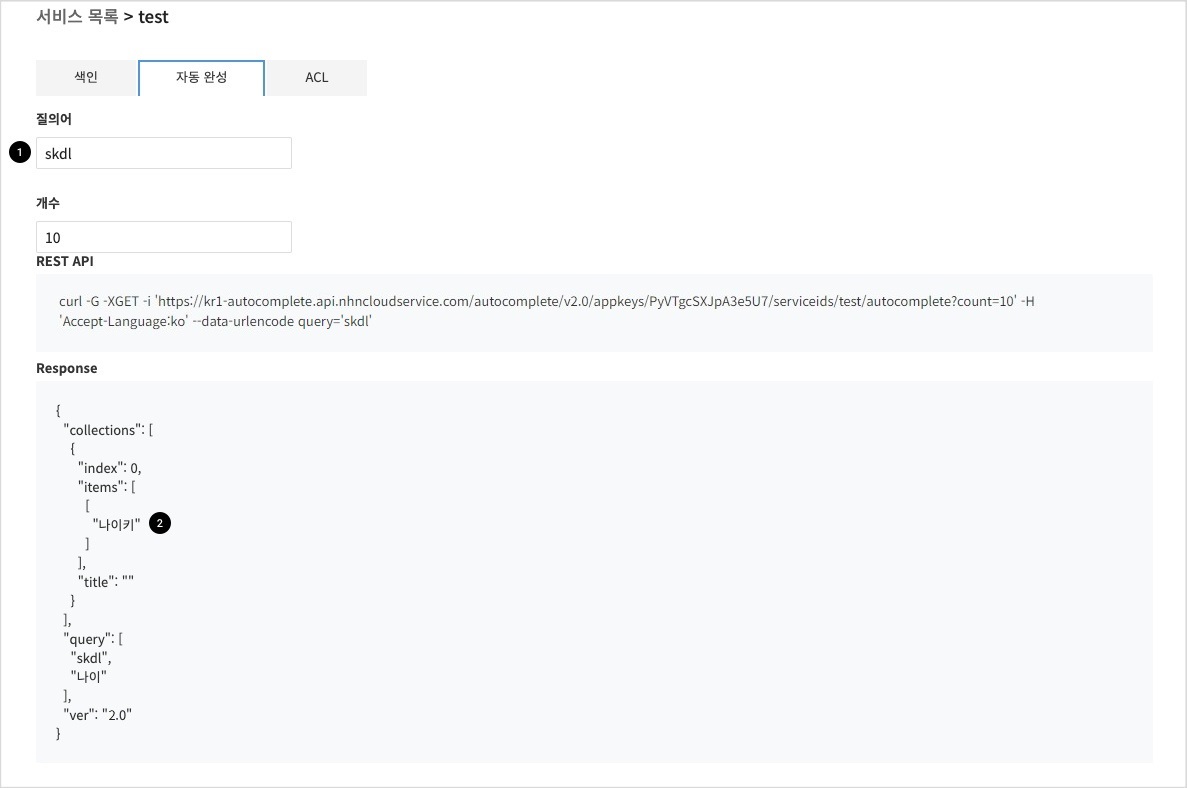
자동 완성
-
'나이'의 영타인 'skdl'를 입력합니다.
-
'나이키'가 출력됩니다.
초성 자동 완성
색인
테스트를 위해 아래 데이터를 색인합니다.
[
  {
    "input": "나이키",
    "weight": 2
  },
  {
    "input": "아디다스",
    "weight": 1
  }
]
- 색인할 때 초성 자동완성을 체크합니다.
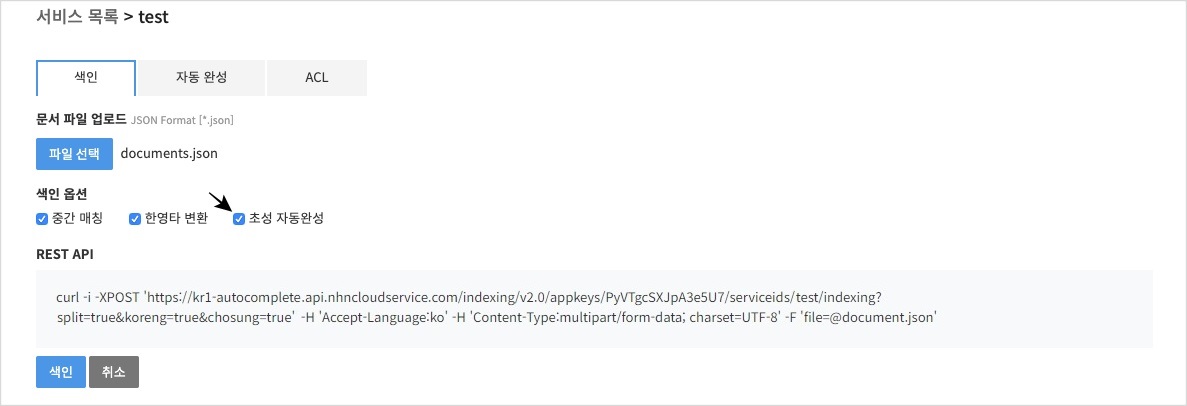
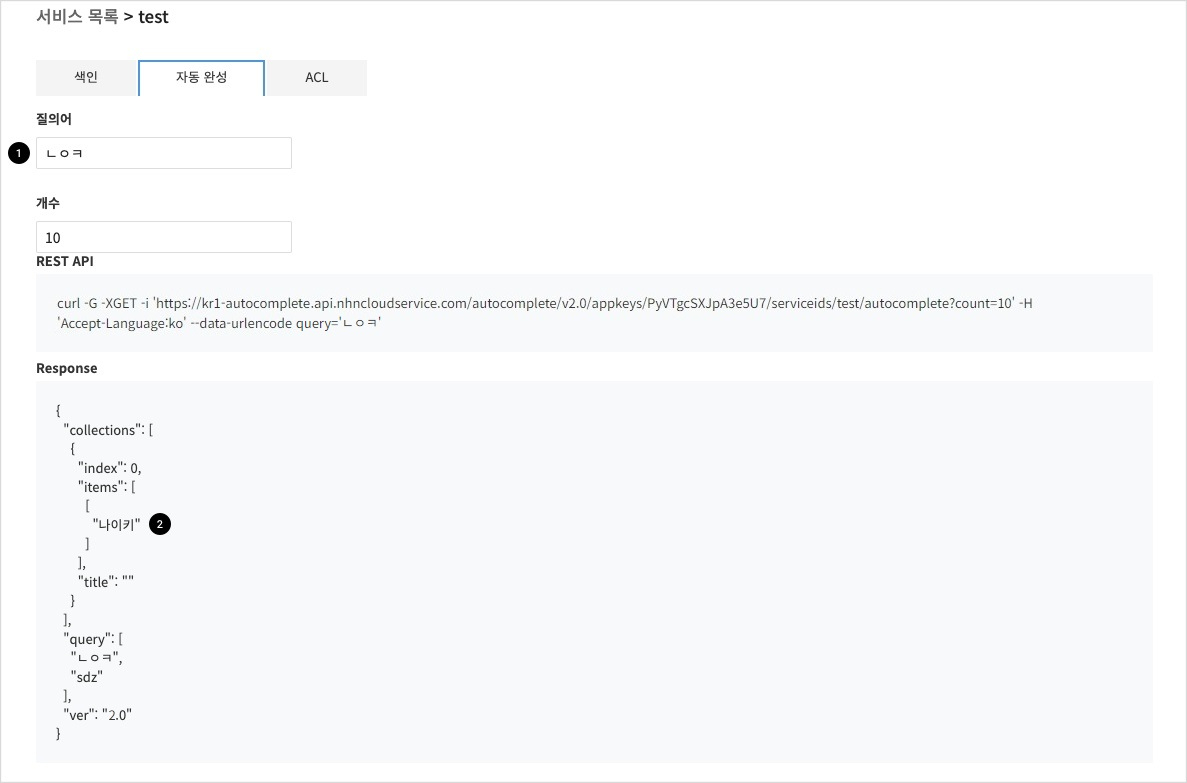
자동 완성
-
'ㄴㅇㅋ'를 입력합니다.
-
'나이키'가 출력됩니다.
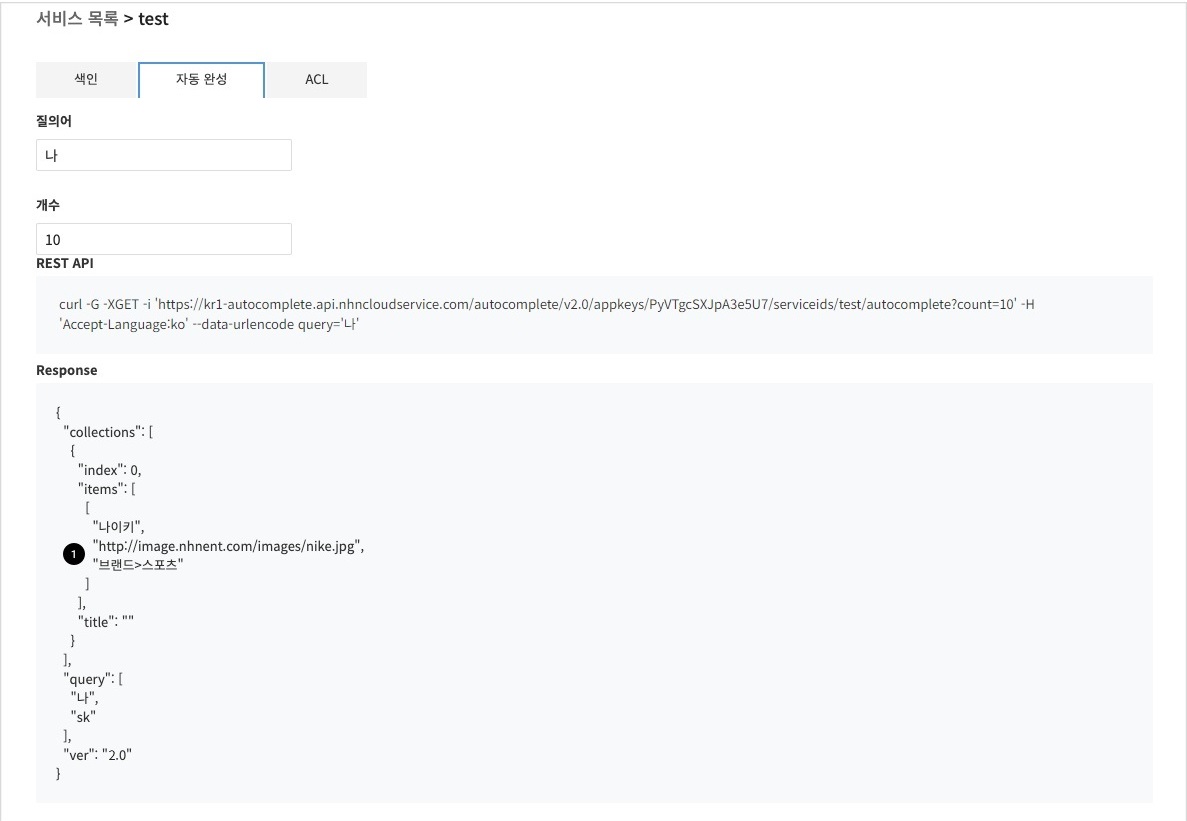
부가 정보 출력
색인
테스트를 위해 아래 데이터를 색인합니다.
[
  {
    "input": "나이키",
    "payload": [
      "http://image.nhnent.com/images/nike.jpg",
      "브랜드>스포츠"
    ],
    "weight": 2
  },
  {
    "input": "아디다스",
    "payload": [
      "http://image.nhnent.com/images/adidas.jpg",
      "브랜드>스포츠"
    ],
    "weight": 1
  }
]
페이로드(payload)에 출력하고 싶은 부가 정보를 입력합니다.
자동 완성
- 입력한 부가 정보(이미지 URL, 카테고리)가 출력됩니다.
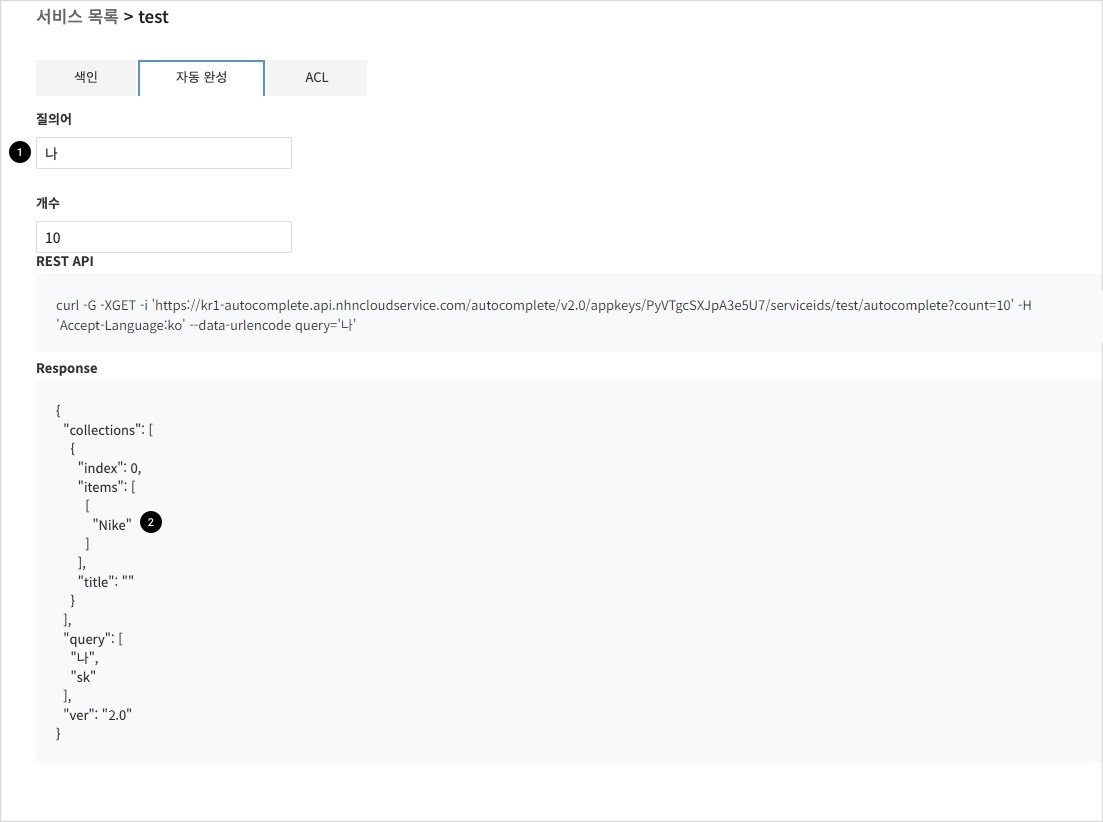
Input/Output을 다르게 설정
색인
테스트를 위해 아래 데이터를 색인합니다.
[
  {
    "input": "나이키",
    "output": "Nike",
    "weight": 2
  },
  {
    "input": "아디다스",
    "output": "Adidas",
    "weight": 1
  }
]
자동 완성
-
'나'를 입력합니다.
-
'Nike'가 출력됩니다.
멀티 서비스
2개 이상 서비스의 자동 완성 결과를 한 번의 자동 완성 API 요청으로 출력하는 기능입니다. 예를 들어 브랜드와 카테고리 자동 완성을 한 번의 API 요청으로 출력할 때 사용합니다.
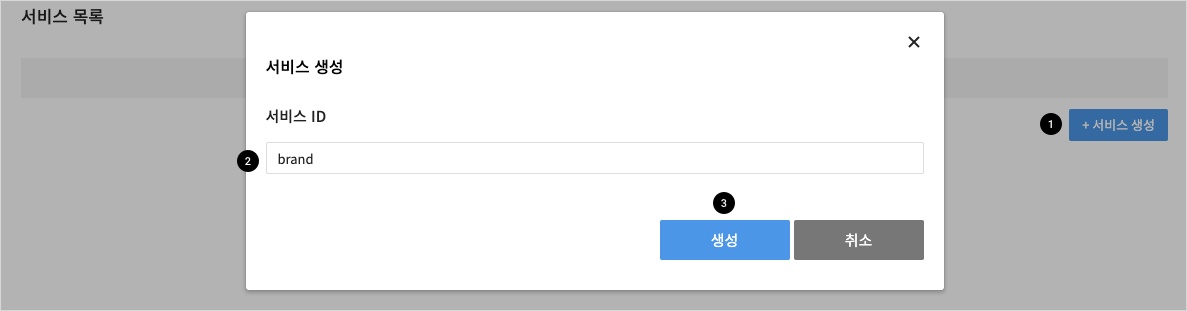
브랜드 서비스 생성
서비스 생성 버튼을 클릭한 후 서비스 생성 창에서 ID를 입력하고 생성 버튼을 클릭합니다.
브랜드 색인
테스트를 위해 아래 데이터를 색인합니다.
[
  {
    "input": "나이키",
    "weight": 2
  },
  {
    "input": "아디다스",
    "weight": 1
  }
]
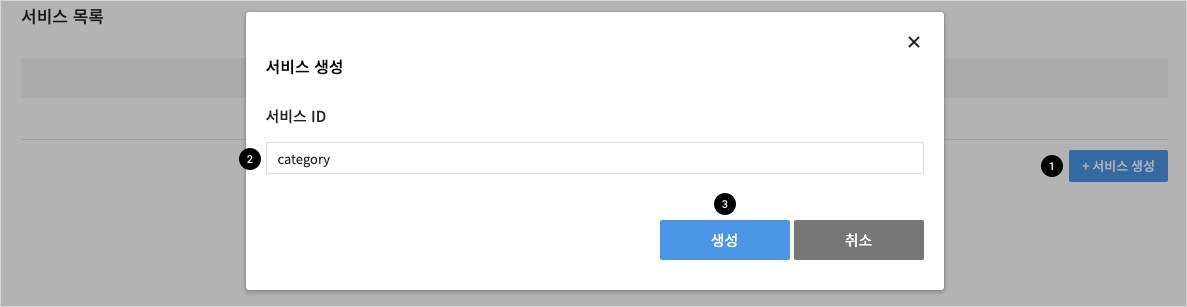
카테고리 서비스 생성
서비스 생성 버튼을 클릭한 후 서비스 생성 창에서 ID를 입력하고 생성 버튼을 클릭합니다.
카테고리 색인
테스트를 위해 아래 데이터를 색인합니다.
[
  {
    "input": "남성가방",
    "weight": 2
  },
  {
    "input": "아우터",
    "weight": 1
  }
]
자동 완성
-
Request
API 호출 시 'serviceids/brand,category'로 요청합니다.
curl -G -XGET 'https://kr1-autocomplete.api.nhncloudservice.com/autocomplete/v2.0/appkeys/PyVTgcSXJpA3e5U7/serviceids/brand,category/autocomplete?count=10' -H 'Accept-Language:ko' --data-urlencode query='나' -
Response
API 응답에 index 0은 brand, index 1은 category 자동 완성 결과가 출력됩니다.
{
  "collections" : [
    {
      "index" : 0,
      "items" : [
        [
          "나이키"
        ]
      ],
      "title" : ""
    },
    {
      "index" : 1,
      "items" : [
        [
          "남성가방"
        ]
      ],
      "title" : ""
    }
  ],
  "query" : [
    "나",
    "sk"
  ],
  "ver" : "2.0"
}
대용량 데이터 색인
기본 색인은 입력할 수 있는 데이터 크기가 10MB로 제한되어 있습니다. 10MB를 초과하는 데이터를 입력할 때는 Full indexing API를 사용합니다.
- Full indexing 시작
curl -i -XPOST 'https://kr1-autocomplete.api.nhncloudservice.com/indexing/v2.0/appkeys/PyVTgcSXJpA3e5U7/serviceids/test/indexing/full/begin'- 새로운 index(저장소)가 생성됩니다.
- Full indexing을 반영하기 전까지는 기존 index로 서비스됩니다.
- Full indexing 요청
curl -XPOST 'https://kr1-autocomplete.api.nhncloudservice.com/indexing/v2.0/appkeys/PyVTgcSXJpA3e5U7/serviceids/test/indexing/full?split=true&koreng=true&chosung=true' -H 'Content-Type:multipart/form-data; charset=UTF-8' -F 'file=@documents-001.json'- documents-002.json, documents-003.json 등 여러 번 색인 요청을 합니다.
- Full indexing 반영
curl -i -XPOST 'https://kr1-autocomplete.api.nhncloudservice.com/indexing/v2.0/appkeys/PyVTgcSXJpA3e5U7/serviceids/test/indexing/full/end'- 색인된 데이터를 서비스에 반영합니다.
- Full indexing 취소
curl -i -XPOST 'https://kr1-autocomplete.api.nhncloudservice.com/indexing/v2.0/appkeys/PyVTgcSXJpA3e5U7/serviceids/test/indexing/full/cancel'- 색인이 진행 중일 때는 동작하지 않습니다.
색인 업데이트
데이터를 추가/수정/삭제할 때는 Incremental indexing API를 사용합니다.
1. 테스트를 위한 데이터 입력
curl -XPOST 'https://kr1-autocomplete.api.nhncloudservice.com/indexing/v2.0/appkeys/PyVTgcSXJpA3e5U7/serviceids/test/indexing?split=true&koreng=true&chosung=false' -H 'Accept-Language:ko' -H 'Content-Type:application/json; charset=UTF-8' -d '
[
  {
    "id": "id-1",
    "input": "나이키 신발",
    "weight": 1
  },
  {
    "id": "id-2",
    "input": "아디다스 신발",
    "weight": 1
  }
]'
- Incremental indexing을 수행하기 위해서는 id를 반드시 입력해야 합니다.
2. Incremental indexing
curl -XPOST 'https://kr1-autocomplete.api.nhncloudservice.com/indexing/v2.0/appkeys/PyVTgcSXJpA3e5U7/serviceids/test/indexing/incremental?split=true&koreng=true&chosung=false' -H 'Accept-Language:ko' -H 'Content-Type:application/json; charset=UTF-8' -d '
[
  {
    "id": "id-1",
    "action": "add",
    "input": "나이키 운동화",
    "weight": 1
  },
  {
    "id": "id-2",
    "action": "delete"
  },
  {
    "id": "id-3",
    "action": "add",
    "input": "뉴발란스 운동화",
    "weight": 1
  }
]'
- action
- add: 기존에 문서가 존재하면 수정, 존재하지 않으면 추가됩니다.
- 위의 예제에서 "id-1"은 수정, "id-3"은 추가됩니다.
- delete: 해당 문서를 삭제합니다.
- add: 기존에 문서가 존재하면 수정, 존재하지 않으면 추가됩니다.
상세 가이드
출력 우선 순위
설정 방법
색인 파일이 아래와 같을 경우 사용자가 'ㄴ' 을 입력하면 '노트북', '나이키', '남성상의'순으로 출력됩니다.
[
  {
    "input": "노트북",
    "weight": 3
  },
  {
    "input": "나이키",
    "weight": 2
  },
  {
    "input": "남성상의",
    "weight": 1
  }
]
- 'ㄴ'으로 시작하는 단어 중 weight가 높은 순서대로 출력됩니다.
ACL
ACL 설정 화면은 다음과 같습니다.

입력 형식
- IP 형식으로 입력 가능합니다.
- 예제) 202.179.177.21
- CIDR 형식으로 입력 가능합니다.
- 예제) 202.179.177.0/24
- IP 또는 CIDR 을 여러 개 입력 가능합니다.
- 예제) 202.179.177.21, 202.179.177.0/24
- all 일 경우 모두 매칭 됩니다.
- 값이 비어 있을 경우 모두 매칭 안됩니다.
- 허용, 거부 둘 다에 해당되면 거부됩니다.
- 허용, 거부 둘 다에 해당되지 않으면 거부됩니다.
클라이언트 예제 코드
다음은 파일 업로드 방식의 색인 예제 코드입니다.
java
- dependency
compile group: 'org.apache.httpcomponents', name: 'httpclient', version: '4.5.6'
compile group: 'org.apache.httpcomponents', name: 'httpmime', version: '4.5.6'
- 색인(파일 업로드 방식)
package com.toast.cloud.autocomplete.client;

import org.apache.http.HttpEntity;
import org.apache.http.client.ClientProtocolException;
import org.apache.http.client.ResponseHandler;
import org.apache.http.client.methods.HttpUriRequest;
import org.apache.http.client.methods.RequestBuilder;
import org.apache.http.entity.ContentType;
import org.apache.http.entity.mime.HttpMultipartMode;
import org.apache.http.entity.mime.MultipartEntityBuilder;
import org.apache.http.impl.client.CloseableHttpClient;
import org.apache.http.impl.client.HttpClients;
import org.apache.http.util.EntityUtils;

import java.io.File;
import java.io.IOException;
import java.io.PrintWriter;

public class IndexingClient {

    public static void main(String[] args) throws IOException {

        String documents = ""
            + "[\n"
            + "  {\n"
            + "    \"input\": \"나이키\",\n"
            + "    \"weight\": 3\n"
            + "  }\n"
            + "]\n";

        File tempFile = File.createTempFile("documents-",".json", new File("/tmp/"));
        tempFile.deleteOnExit();

        PrintWriter printWriter = new PrintWriter(tempFile);
        printWriter.println(documents);
        printWriter.close();

        try (CloseableHttpClient httpclient = HttpClients.createDefault()) {

            // build multipart upload request.
            HttpEntity data = MultipartEntityBuilder.create()
                .setMode(HttpMultipartMode.BROWSER_COMPATIBLE)
                .addBinaryBody("file", tempFile, ContentType.DEFAULT_BINARY, tempFile.getName())
                .build();

            // build http request and assign multipart upload data.
            HttpUriRequest request = RequestBuilder
                .post("https://kr1-autocomplete.api.nhncloudservice.com/indexing/v2.0/appkeys/PyVTgcSXJpA3e5U7/serviceids/test/indexing?split=true&koreng=true&chosung=false")
                .setEntity(data)
                .build();

            System.out.println("Executing request " + request.getRequestLine());

            // Create a custom response handler.
            ResponseHandler<String> responseHandler = response -> {
                int status = response.getStatusLine().getStatusCode();
                if (status >= 200 && status < 300) {
                    HttpEntity entity = response.getEntity();
                    return entity != null ? EntityUtils.toString(entity) : null;
                } else {
                    throw new ClientProtocolException("Unexpected response status: " + status);
                }
            };
            String responseBody = httpclient.execute(request, responseHandler);
            System.out.println(responseBody);
        }
    }
}
php
- 색인(파일 업로드 방식)
<?php
    $documents = ""
      . "[\n"
      . "  {\n"
      . "    \"input\": \"나이키\",\n"
      . "    \"weight\": 3\n"
      . "  }\n"
      . "]\n";

    $file = DIRECTORY_SEPARATOR.trim(sys_get_temp_dir(), DIRECTORY_SEPARATOR).DIRECTORY_SEPARATOR.ltrim("documents.json", DIRECTORY_SEPARATOR);
    file_put_contents($file, $documents);

    register_shutdown_function(function() use($file) {
        unlink($file);
    });

    $data = array(
        'file' => curl_file_create($file, "application/json", basename($file))
    );

    $ch = curl_init();
    curl_setopt($ch, CURLOPT_URL,"https://kr1-autocomplete.api.nhncloudservice.com/indexing/v2.0/appkeys/PyVTgcSXJpA3e5U7/serviceids/test/indexing?split=true&koreng=true&chosung=false");
    curl_setopt($ch, CURLOPT_POST, 1);
    curl_setopt($ch, CURLOPT_HTTPHEADER, array("Content-Type:multipart/form-data; charset=UTF-8"));
    curl_setopt($ch, CURLOPT_POSTFIELDS, $data);
    curl_setopt($ch, CURLOPT_RETURNTRANSFER, true);
    curl_setopt($ch, CURLOPT_HEADER, true);

    $response = curl_exec($ch) or die(curl_error($ch));
    print_r($response);

    curl_close($ch);
?>