Compute > Instance > Overview
An instance is a virtual server composed of virtual CPUs, memory, and root block storage. You can install your services and applications on this server and use it in combination with the various services provided by NHN Cloud.
Components
An instance consists of the following components:
- Image: Virtual disk that contains the operating system of an instance
- Flavor: Virtual hardware performance specifications of an instance
- Availability Zone (AZ): Physical location where an instance will be created
- Key Pair: Key used to access an instance
- Security Group: Network security settings for an instance
- Network: Virtual network where an instance will be connected
Instance properties and usage change depending on these components. While settings for these components, with the exception of image and availability zone, can be modified after the creation of an instance, some flavors cannot be modified after an instance has been created. For more details on modifying instance flavors, see Modify Flavor in the Console Guide.
Image
An image is a virtual disk that contains an operating system. NHN Cloud currently supports CentOS, Debian, Ubuntu, Rocky, and Windows. For more details on the supported operating system versions, see NHN Cloud Service Introduction.
All images are configured to run optimally on an instance's virtual hardware and are safe to use as they have undergone security inspection by NHN Cloud. For more details on images, see Image Overview.
Flavor
NHN Cloud provides various instance flavors to support a wide range of use cases. Instances can be created with flavors that best match the requirements of your services or applications. Flavors can be easily modified from the web console, even after an instance has been created.
| Type | Description |
|---|---|
| m2 | A flavor with a balanced setting between CPU and memory. Recommended when performance requirements of a service or an application are not clear. |
| c2 | A flavor optimized for high CPU performance. Recommended for web application servers or analytics systems that require high-performance computations. |
| r2 | A flavor optimized for high memory utilization. Recommended for in-memory databases or cache servers. |
| t2 | A low-cost instance. Recommended for servers with low workloads. |
| u2 | The cheapest instance. Recommended for servers with low workloads. This flavor utilizes local block storage, which makes it a less stable but more affordable option compared to other flavors. Instances of this flavor do not guarantee I/O performance. |
| x1 | A flavor that supports high-end CPU and memory. Recommended for services or applications that require high performance. |
Availability Zone
NHN Cloud has divided the entire system into multiple availability zones to prepare for potential failures caused by physical hardware issues. Each availability zone has its own storage system, network switch, data center space, and power supply units. A failure that occurs within one availability zone does not affect other zones, thereby increasing the availability of the whole service. You can ensure increased service availability by creating instances across multiple availability zones.
The following properties hold across different availability zones.
- Instances dispersed across different availability zones can communicate with each other over the network without incurring additional network usage costs.
- Block storage can be shared between instances created within the same availability zone, but not between instances in different availability zones.
- Floating IP can be shared across different availability zones. If one availability zone experiences a failure, floating IP can quickly be relocated to another availability zone in order to minimize downtime.
Key Pair
A key pair is a pair of PKI-based public and private SSH keys. To access an instance created in NHN Cloud, a key pair is required instead of keyboard-inputted ID/PW authentication which is vulnerable to security attacks. You can safely access an instance once you have been authenticated after sending the instance your login information encoded by your key pair's private key. For more details on how to access instances using key pairs, see How to Access Instances.
Key pairs can be newly generated from the NHN Cloud console during instance creation, or you can register your own existing key pairs. For more details on how to register key pairs, see Import Key Pairs in the Console Guide.
[Caution] When a key pair is newly generated, its private key is downloaded. As private keys are issued only once, be sure to store downloaded private keys in a safe disk or USB drive. If a private key is exposed, anyone can access the instance using the exposed private key, so it must be managed carefully.
Security Group
A security group is a virtual firewall that determines network traffic delivered to an instance. For more details on security groups, see VPC Overview.
[Note] The default security group is configured to ignore all inbound network traffic. Before accessing an instance using SSH, configure the instance's security group to allow access to the SSH port.
Network
An instance must be connected to at least one network defined in the VPC in order to communicate externally. An instance that is not connected to a network cannot be accessed. To create or modify networks, see VPC Overview.
Pricing
Instances are charged using the following criteria.
- Instances are charged from the moment they are created.
- Instance root block storage are charged separately according to the block storage pricing policy.
- When an instance is stopped, a 90% discount based on the website rate is applied for 90 days. If your suspension exceeds 90 days, you will revert to normal rates while maintaining your suspension.
- Terminated instances are not billed.
For more details on pricing, see Pricing.
How to Access Instances
How to Access Linux Instances
You can access your Linux instances using an SSH client. An instance cannot be accessed if its security group does not have SSH ports (22 by default) allowed. See VPC Overview for more details on how to allow SSH access. If a floating IP is not assigned to an instance, the instance cannot be accessed from outside NHN Cloud. See VPC Overview for more details on how to assign floating IP.
How to Access Linux Instances from Mac or Linux Using an SSH Client
Generally, Mac and Linux have SSH clients installed by default. Use a key pair's private key to access an instance from an SSH client as shown below.
CentOS instances
$ ssh -i my_private_key.pem centos@<instance IP>
Ubuntu instances
$ ssh -i my_private_key.pem ubuntu@<instance IP>
Debian instances
$ ssh -i my_private_key.pem debian@<instance IP>
Rocky instances
$ ssh -i my_private_key.pem rocky@<instance IP>
How to Access Linux Instances from Windows Using PuTTY SSH Client
PuTTY SSH client is a widely used SSH client program for Windows. Install PuTTY before proceeding to the next steps.
Follow these three steps in order to access Linux instances from Windows using the PuTTY SSH client.
- Convert your key pair's private key to a PuTTY-compatible private key
- Register your PuTTY-compatible private key with PuTTY
- Access instances with PuTTY
1. Convert Your Key Pair’s Private Key to a PuTTY-Compatible Private Key
In order to use PuTTY, you must convert your private key into a PuTTY-compatible private key format. To convert your key, use puttygen which is installed along with PuTTY.
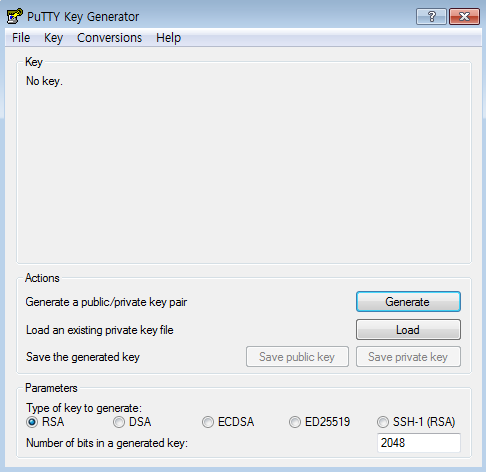
At the bottom of the PuTTY Key Generator window under Parameters, select RSA for the Type of key to generate, and enter the default value '2048' bits for the Number of bits in a generated key. Under Actions, click Load next to Load an existing private key file to import your key pair's private key file.
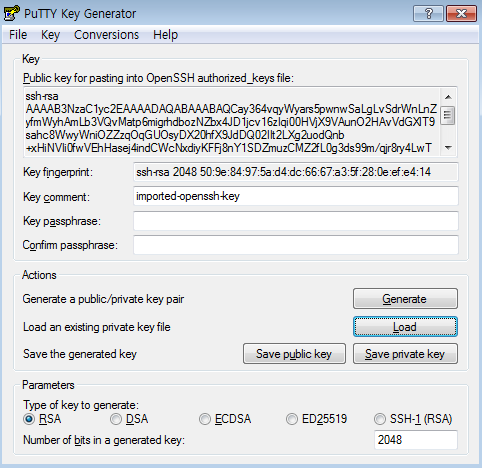
Under Actions, click Save private key next to Save the generated key to save the converted PuTTY-compatible private key. If you save the private key leaving the Key passphrase blank, the message "Are you sure you want to save this key without a passphrase to protect it?" will appear. In order to save your converted private key more securely, set a passphrase before saving.
[Caution] If you wish to be able to automatically log in to your instance, you should not set a key passphrase. When a passphrase is used, you must manually enter the private key's passphrase during login.
2. Register Your PuTTY-Compatible Private Key With Putty
Your PuTTY-compatible private key generated in the previous step can be registered by the following two methods.
- By registering a private key file for authentication in PuTTY
- By registering a private key file for authentication in pageant (PuTTY's authentication agent)
A. Registering a Private Key File for Authentication in PuTTY
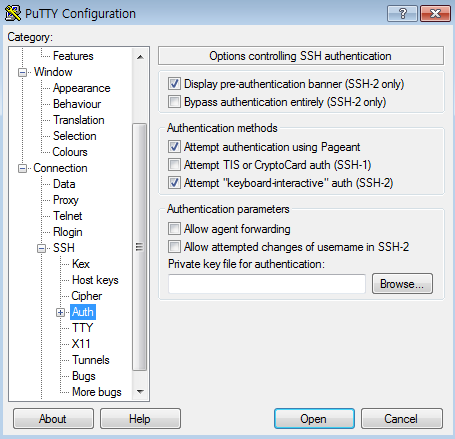
Run PuTTY and select Connection > SSH > Auth from the Category on the left. Under Authentication parameters on the right, register your PuTTY-compatible private key in Private key file for authentication.
Once you register your private key, you do not have to re-register your private key file each time you access your instance if you save your access information. For details on how to save your access information, see the section below on accessing instances.
B. Registering a Private Key File for Authentication in pageant (PuTTY's Authentication Agent)
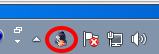
When you run pageant, which is installed along with PuTTY, the icon shown below appears in the Windows tray. Right-click the pageant icon and select Add Key to add your PuTTY-compatible private key.
To confirm that your private key has been added, select View Keys. If successful, the added key is displayed as below.
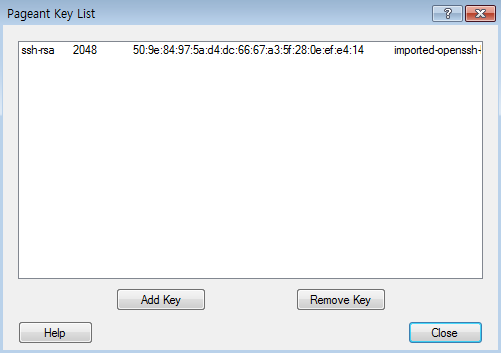
Once you run pageant, it remains running in the Windows tray, so there is no need for you to rerun it every time you access an instance. However, you must run pageant again when you restart Windows.
3. Access Instances With PuTTY
Now that the PuTTY-compatible private key has been successfully registered, run PuTTY.
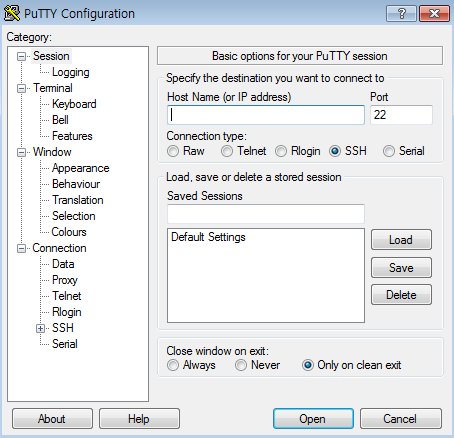
Set the Host Name as the following.
CentOS
centos@<Instance IP>
Ubuntu
ubuntu@<Instance IP>
Debian
debian@<Instance IP>
Rocky
rocky@<Instance IP>
Select 22, the default SSH port, for the Port, and SSH for the Connection type.
If all of the information is correct, save the session. Under Load, save or delete a stored session, enter the name of the session to save in Saved Sessions and click Save to save the session. If you do not save the session, your private key settings registered in 2-A are also not preserved.
Now click Open to access your instance.
How to Access Windows Instances
To access your Windows server, select a Windows instance to access from the NHN Cloud console. In the instance details page under the Access Information tab, click Confirm Password to check the password set in the Windows server.
Your key pair's private key that you input in Confirm Password is not sent to the server, but is instead only used in your browser to decrypt the password.
Click Connect next to Confirm Password to receive the rdp file configured for remote desktop access and run it to access your Windows server. Use Administrator for your Windows server ID, and use the password that you checked from the NHN Cloud console.