Game > Gamebase > Console Guide > Push
You can send push notification to app users.
In Gamebase, push notifications are provided by applying TOAST Cloud Push service.
Push
[Important]
This menu is used when the Gamebase SDK 2.6.0 or later is applied to the current game service.
You can see the history of sent push notifications and the list of scheduled push notifications.
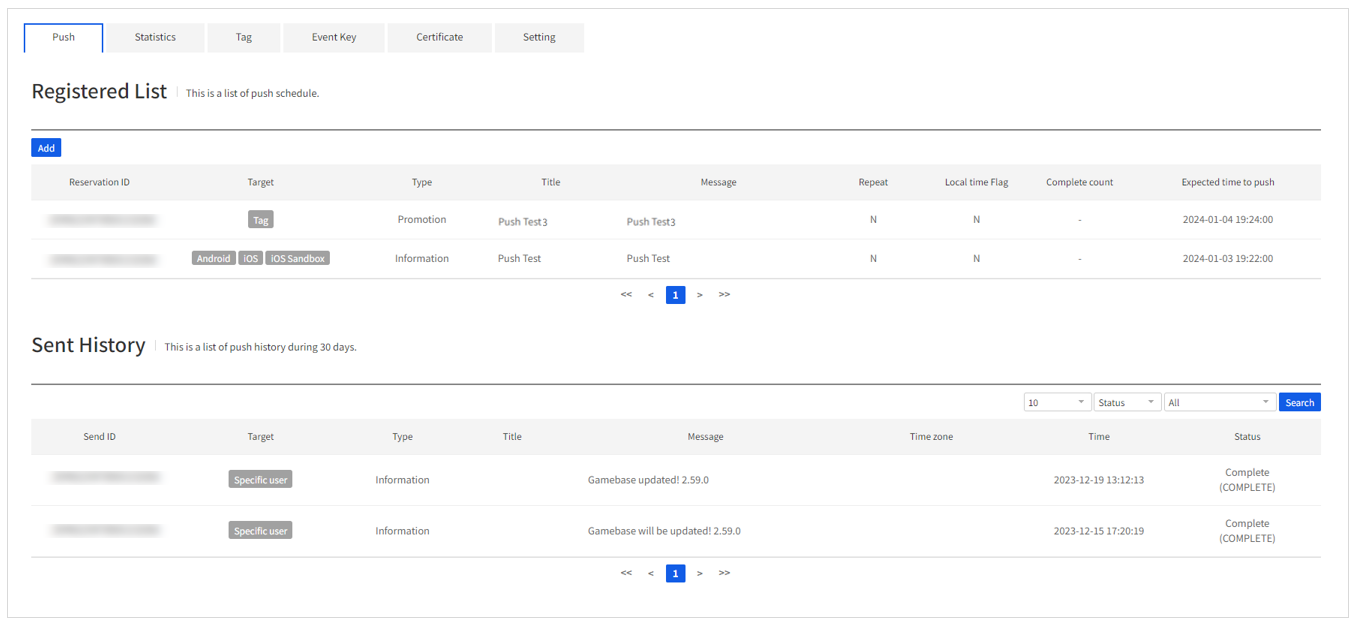
Registered List
By selecting the push from the scheduled list, you can see the expected time for sending the push and registration info. You can click the Cancel Transfer button to cancel the scheduled transfer or click the Copy button to register a new push using the registered push registration info.
Send History
By selecting the push from the transfer history list, you can see the details about the transferred push notifications. If you click the Copy button, you can easily register the push by using the registration info of the sent push.
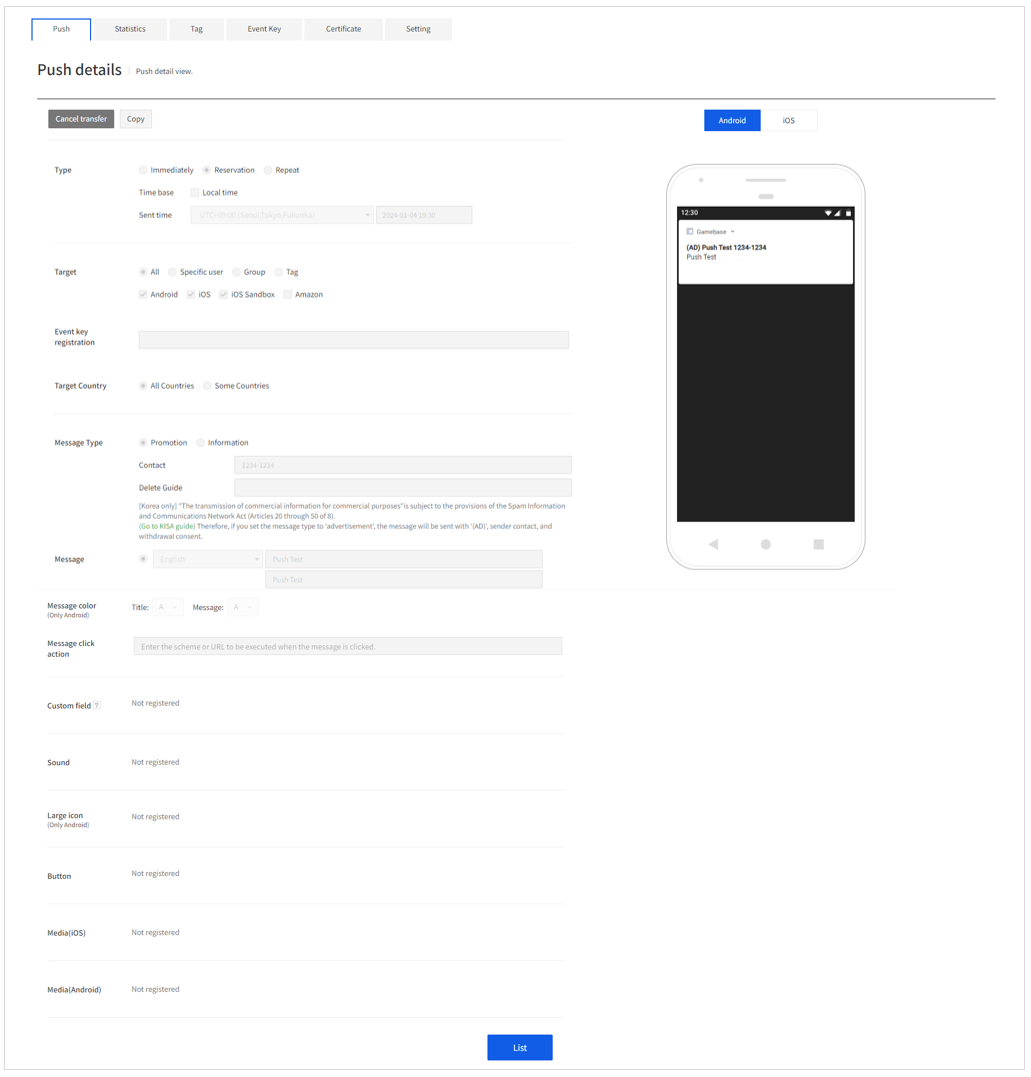
Register Push
To register a new push, click the Register button. You can check the preview on the right to see how the value registered in the console appears in the actual device.
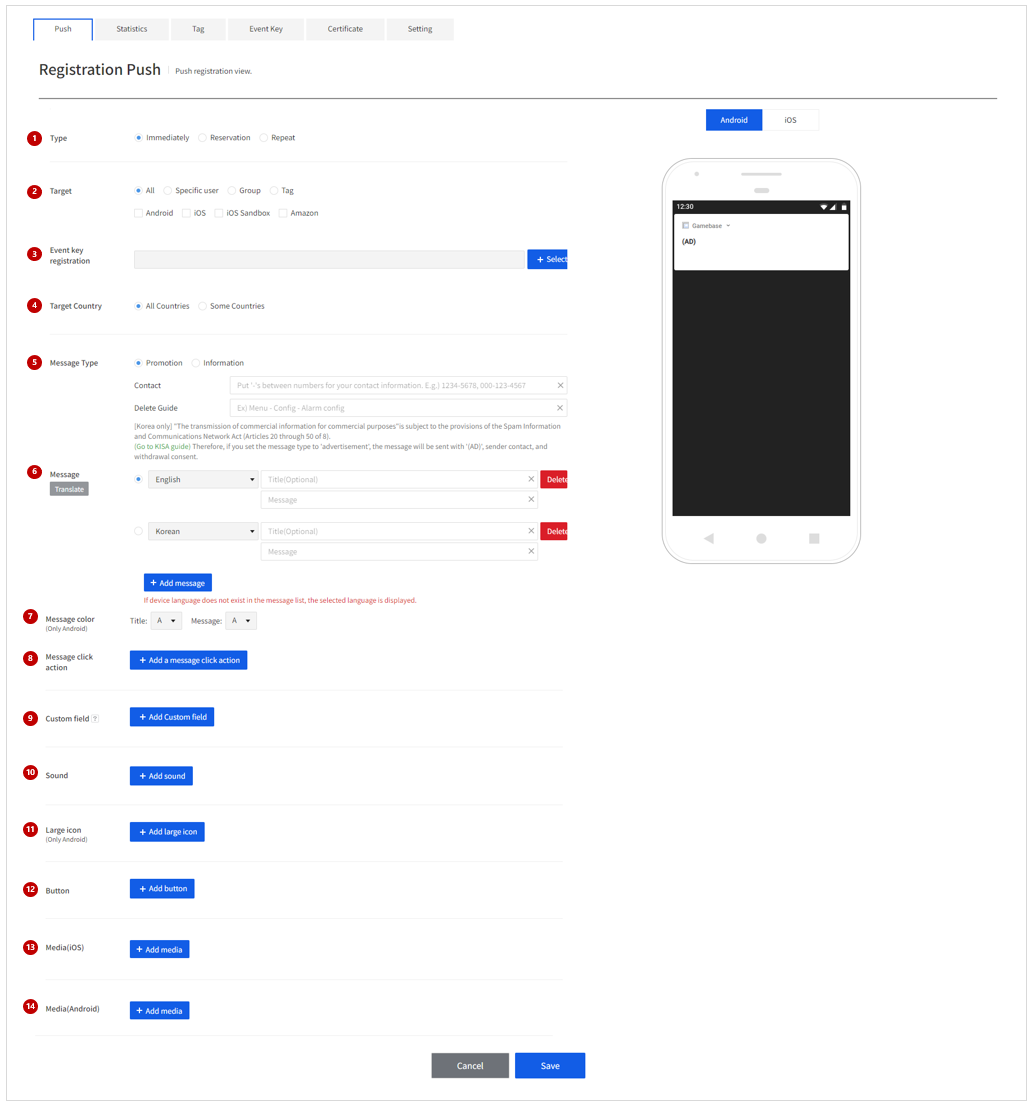
(1) Send type
Select the sending frequency. - Send immediately: Sends the push message right after registration. - Schedule send: Sends the push message at the scheduled time. To send the push message at the country standard time of the user's device, select Send in Local Time. If you select Send in Local Time and set it to '2017-01-01 09:00', users of Korean devices receive the push message on '2017-01-01 09:00' Korea Standard Time, and the users with British devices on '2017-01-01 09:00' British Standard Time. - Repeated Send: Periodically sends the same push message. To send the push message in the country standard time of the user's device, select Send in Local Time. Select the sending period and time. Enter the sending frequency as Daily, Weekly, or Monthly. - Daily: Sends the push message daily. - Weekly: Pick a certain day to send the message. Multiple days can be selected. - Monthly: Sends the push message on a specific date every month. Only a date (1 - 31) can be entered, and more than one dates are allowed. For example, if you want the message to be sent on 1st, 5th, and 10th day of every month, enter 1, 5, and 10.
(2) Recipient
Select the recipient to send the push message to. - Send to all: Can be selected based on OS. All users of the selected OS will receive the push message. - Send to specific members only: Select it when sending the push message to specific members only. The entered User ID sends the push message to the device with the push token registered. When the target user plays the game with 5 devices, the push message is sent to 5 devices. - Group send: Register the list of the users with intention to receive the message as a file. Group sending is for up to 10,000 users at a time. - Tag send: You can use the tag to send the push message. The push message can be sent with the tags registered in Push - Tag menu, and you can also register multiple tags. The following are the tag filtering functions. - AND: Send the push message to the user who meets all selected tags. - OR: Send the push message to the user who meets at least one of the selected tags.
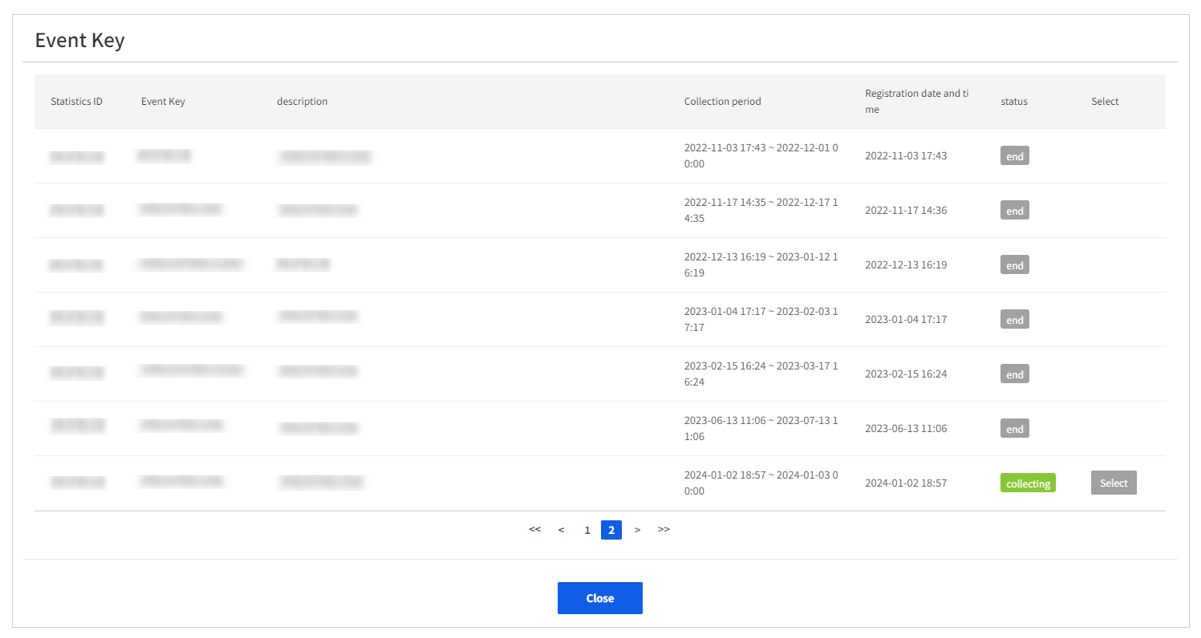
(3) Event key
Select the event key used for push send statistics.
If you click the Select button, a popup with a selectable list of event keys appears, and you can select an event key in Collecting status.
(4) Target country
Select the country to send the push message to. - All countries: Send the push message to all users. - Some countries: Send the push message to users from the selected countries. Typing the country name suggests autocomplete words. If there is no country to enter, please contact our Customer Center.
[Note]
Criteria for determining the country This is determined based on user's USIM country code. If there is no USIM, the push message is displayed based on the country setting of the device.
(5) Message type
[Note]
A function provided for compliance with Korea's 'Information Network Law'. If the push message is not informational, it must begin with '(Advertisement)' and contain contact information and the instruction for how to opt out.
- Promotional: The header '(Advertisement)' is added to the input message, and contains contact information and the instruction on how to opt out. In Korea, advertising push messages (such as Send to All) must be sent as a 'Promotional' message in order to comply with the 'Information Network Law'.
- Informational: Only the typed-in text is sent as the push message. For users of non-Korean devices (USIM country code is non-Korean), send it as an 'Informational' message.
[Important]
Be careful when you enter '(Advertisement)' into the input message after selecting Promotional because there can be multiple '(Advertisement)' texts.
(6) Message body
Enter the push message to show to users.
The message can be registered in a number of languages, and it will be shown in default language if the user uses a language other than the registered languages. To add a language, click the Add Message button at the bottom. To add the language not in the list, please contact our Customer Center. If you select 'Auto-translate to default language', the message is translated based on what was entered in the default language and fill out the message using the appropriate language set for each one.
[Note]
If the device does not receive the push message which was already sent, it is highly likely that the user did not register the push token. Please make sure the user's push token has been registered. To find out how to register a push token in the platform, see the following document.
(7) Message text color (Only Android)
You can set the text color of the push message in the Android device. You can set the color for the subject and body by either picking the color from text color selection window or by manually entering the RGB hex value. The selected text color can be viewed in the preview screen on the right.
(8) Message click action (optional)
You can set a URL to go to or a scheme to use when a push message is clicked.
(9) Custom fields (optional)
You can set a custom key that you want to pass along with the push message. You can create an item using the Add Field button, and you can create up to 10 items.
(10) Notification sound (optional)
You can set the notification sound which is played when the device receives a push message. You can set the sound by clicking the Add Notification Sound button. The default sound is played if no particular sound has been set. Enter the external URL address or the path of the notification sound file deployed in app.
(11) Large icon (Only Android)
You can click the Add Large Icon button to set the icon image to show on the right upon receiving a push message. Once you set the large icon image and send the push message, it appears only in the Android device and not in the iOS device. Select External to enter the external URL of the icon image to display, or select Internal to enter the path of the icon image file deployed in app. If it is an external image, you can check the icon beforehand in the preview on the right.
(12) Button
You can include up to 3 buttons in the message. These buttons appear at the bottom upon receiving a push message. There are 4 button types, each with its own behavior and settings.
- Open app: Clicking the button in the push message runs the app. You can specify the button name only.
- Open URL: Clicking the button in the push message redirects you to the URL which was entered in the console. You can use the app schema to execute certain apps or connect the web page.
- Response: Clicking the button in the push message opens a window to which you can respond. In iOS, you can set the name of the Send button along with this.
- Close: Clicking the button in the push message closes the push message. You can specify the button name only.
(13) Media (iOS)
You can add a media which is dynamically played when receiving an iOS push message. You can set the IMAGE, GIF, VIDEO, and AUDIO, and enter the external URL to connect to or internal file path.
(14) Media (Android)
You can add a media which is played when receiving an Android push message. In Android, you can only set the IMAGE, and enter the external URL to connect to or internal file path.
Statistics
You can see the indicators related to the push message, token, and inbound settings in tables and on graphs. The statistics consist of the following menus:
- Outbound/Inbound: Indicators relating to sending and receiving the push message
- Register token: Indicators relating to registering and deleting the push token
- Inbound settings: Indicators relating to inbound push settings
Outbound/Inbound
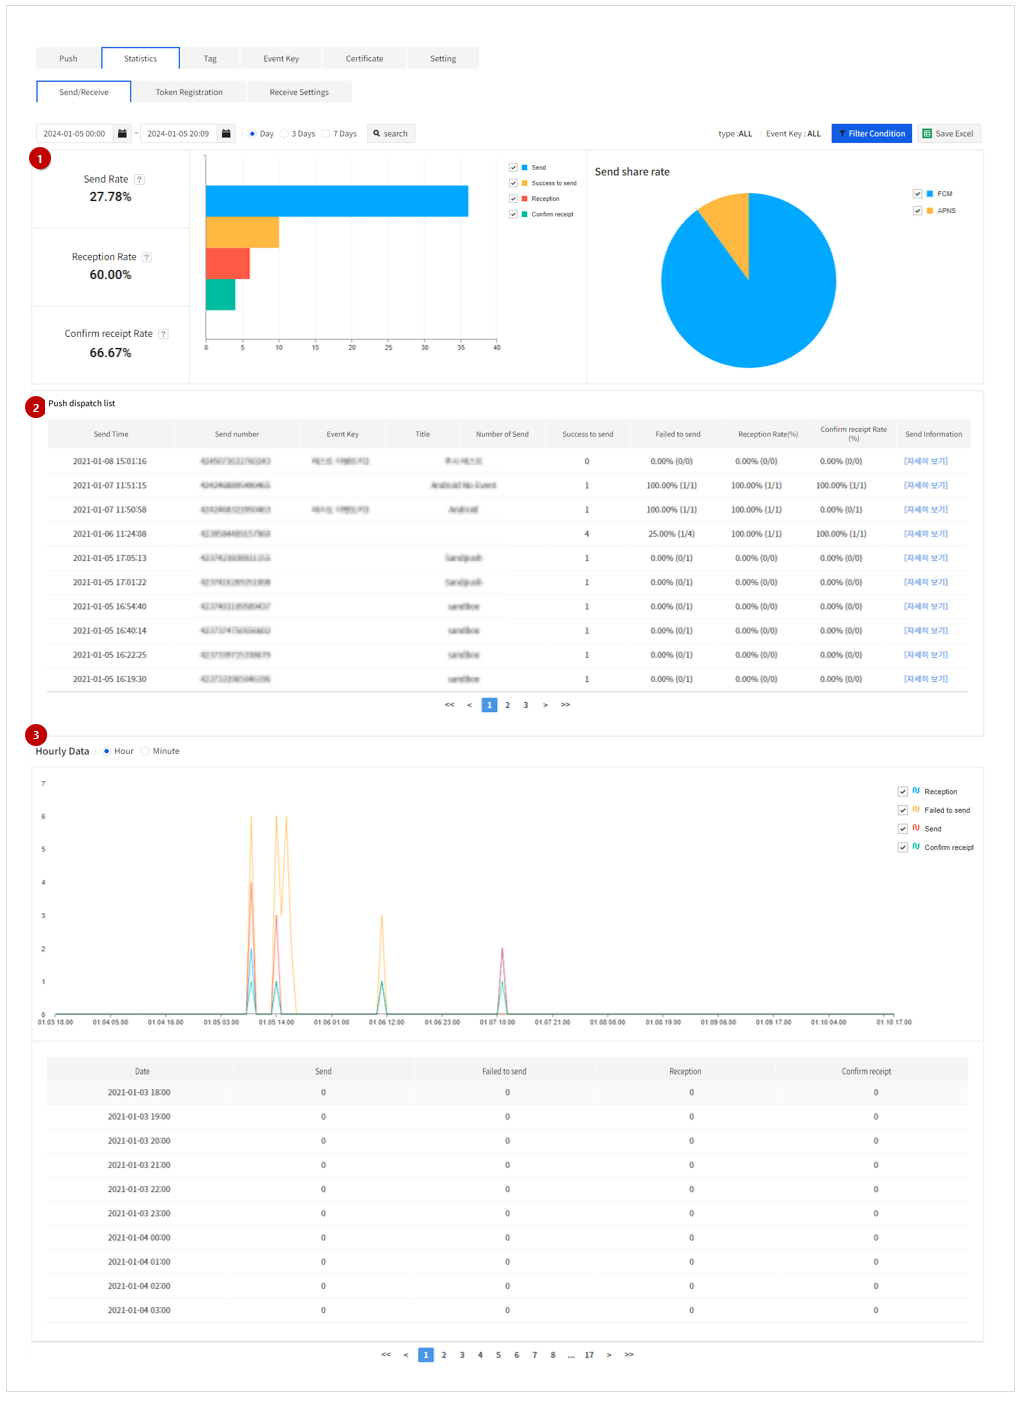
- Outbound/inbound statistics
Shows the outbound/inbound statistics of push message within the selected period.
- Outbound rate: Total number of successful outbounds / total number of outbounds within the period
- Inbound rate: Total number of successful inbounds / total number of inbounds within the period
- Confirmed inbound rate: Total number of inbounds checked / total number of inbounds succeeded within the period
[Note] To collect statistics data on inbound rate and confirmed inbound rate, go to Settings > Receiving and Confirming Message and set to ON.
-
List of pushes sent List showing the push messages that were sent during the selected period
-
Hourly data Shows the indicators on sent push, failed send, inbound, and confirmed inbound based on the interval during the selected period.
-
Can select it in minutes only if the selected period is less than 24 hours.
Token registration
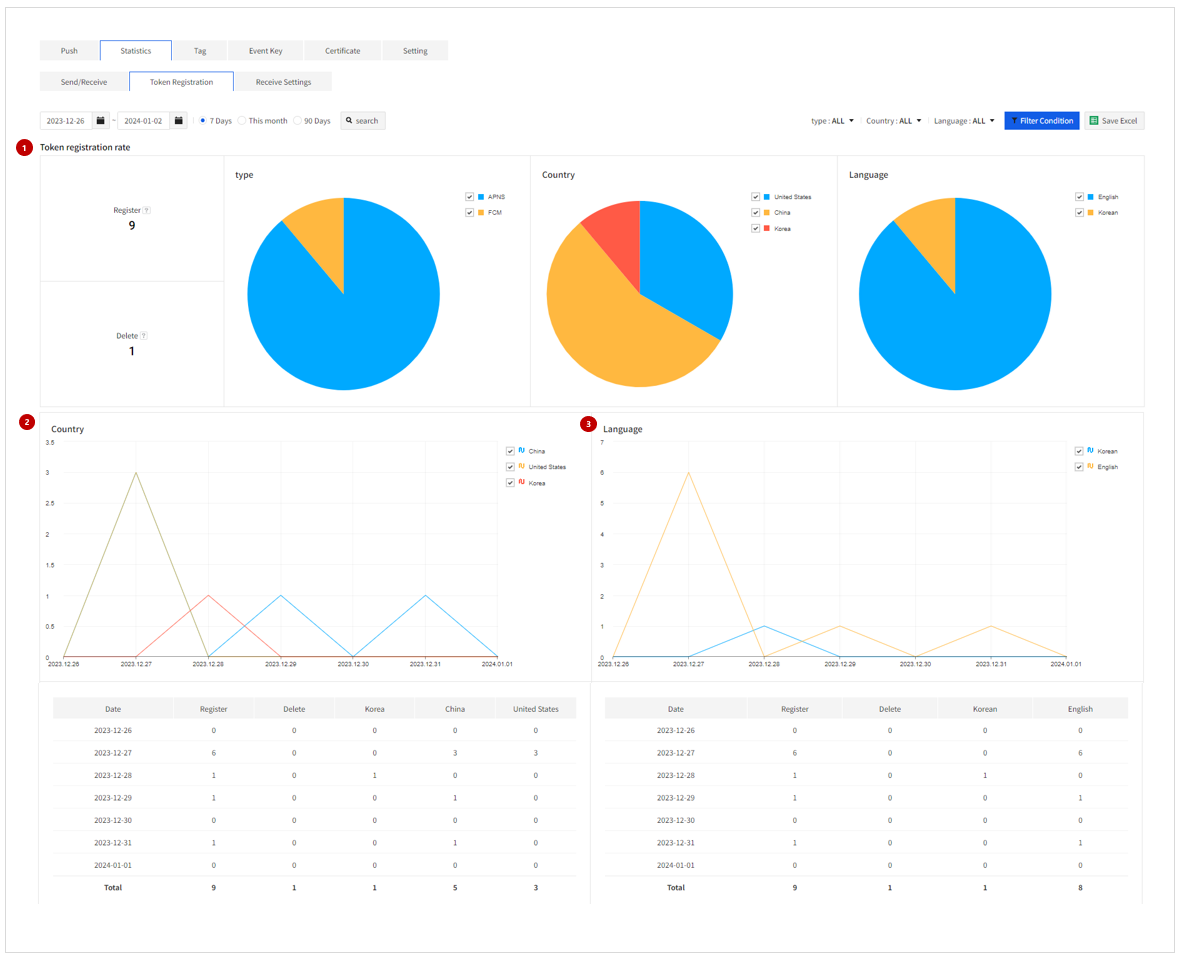
- Token registration statistics
Shows the statistics on token registration and deletion during the selected period.
- Type: Registration share based on the token type
- Country: Token registration share based on the country of use
-
Language: Token registration share based on the user's language
-
Country Shows the statistics on token registration and deletion based on the user's country during the selected period.
-
Language Shows the statistics on token registration and deletion based on the user's selected language during the selected period.
Inbound settings
Shows the inbound settings statistics during the selected period.
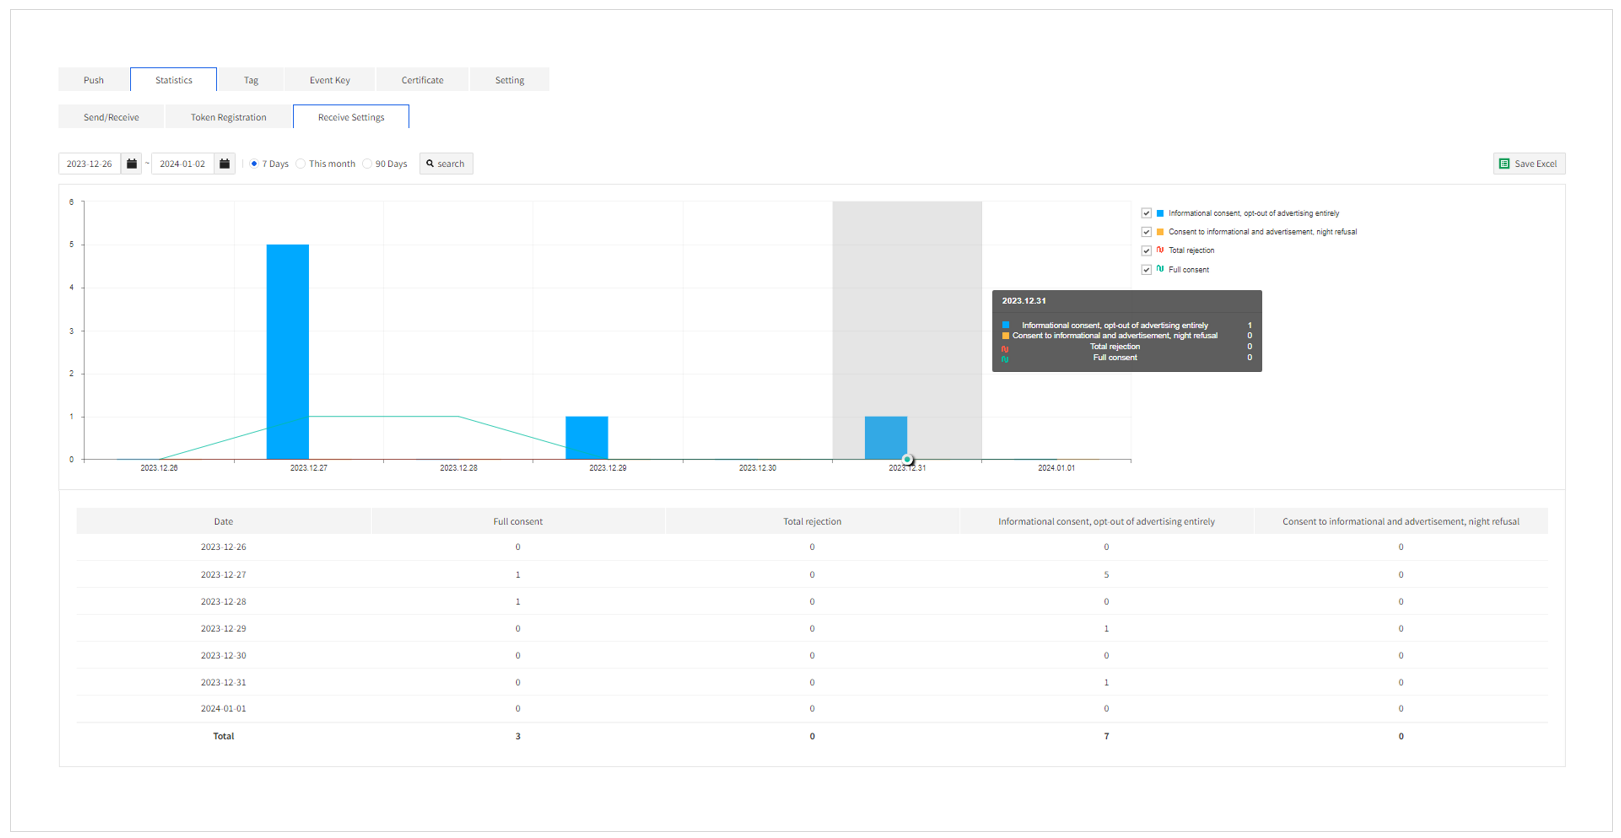
| Type | Information | Advertisement | Night-time Advertisement |
|---|---|---|---|
| Accept all | O | O | O |
| Reject all | |||
| Accept information, reject all advertisements | O | ||
| Accept information and daytime advertisement, reject night-time advertisement | O | O |
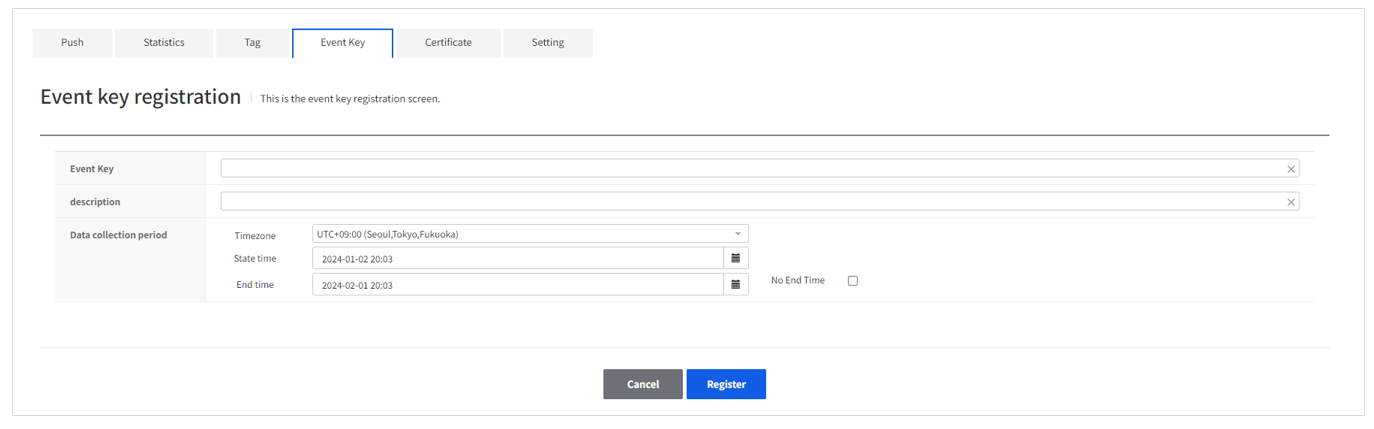
Event Key
You can manage the event key used for push send statistics.
 In Push, you can register the event key which will be used for sending the push message.
Event Key register
Event Key detail
You can manage the registered event key.
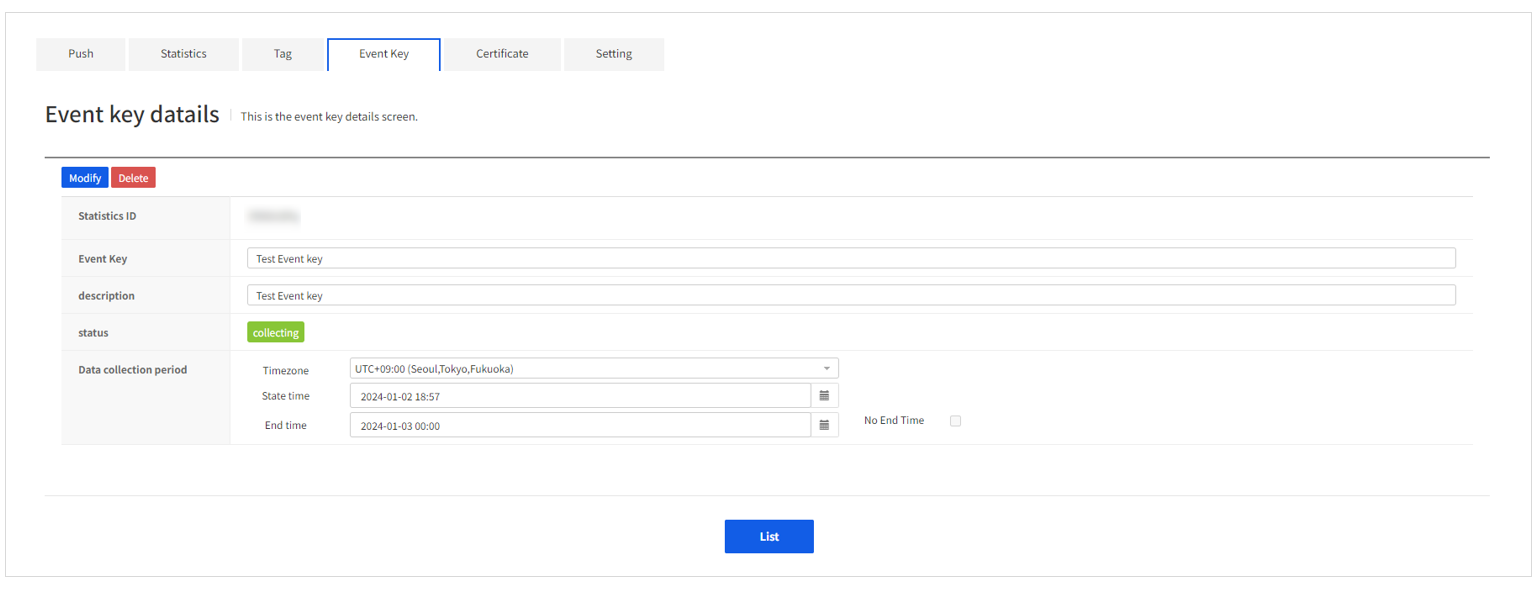
Click the Delete or Modify button to delete or modify the event key information.
Authentication
You can manage the certificate used for push sending.
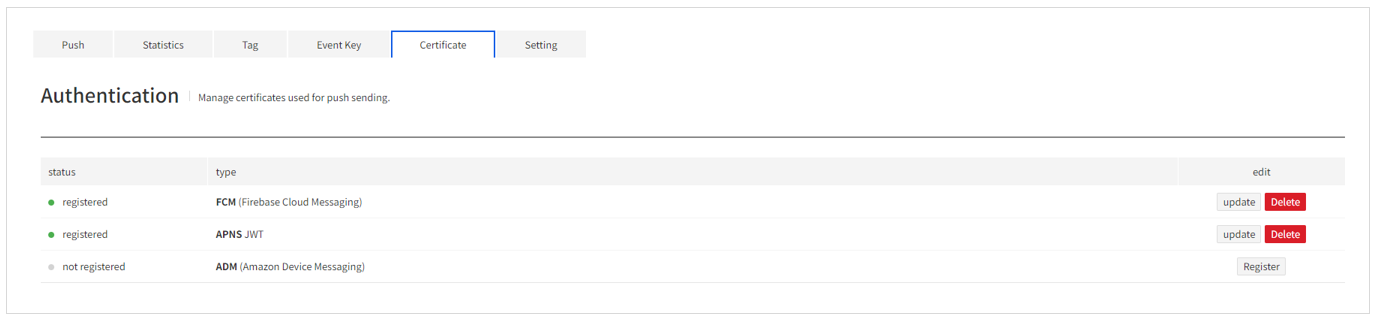
For each certificate, click the Register, Modify, or Delete button to register, modify, or delete the certificate.
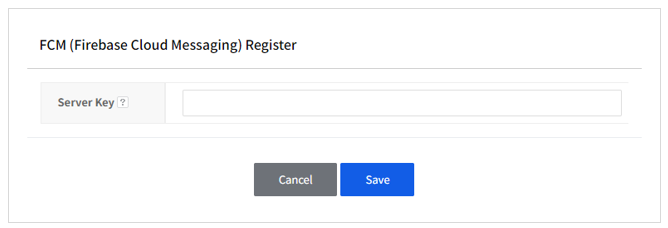
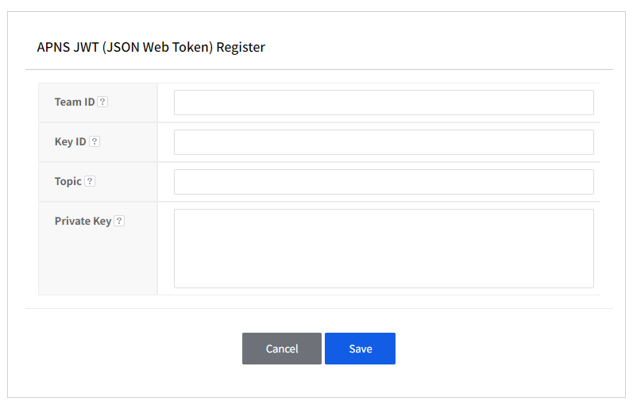
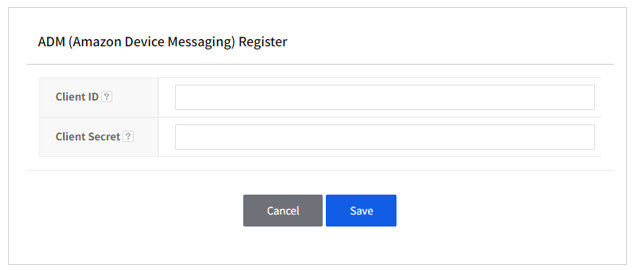
Authentication register

Tag
Provides a tag function that can send push messages by grouping users according to specific criteria.
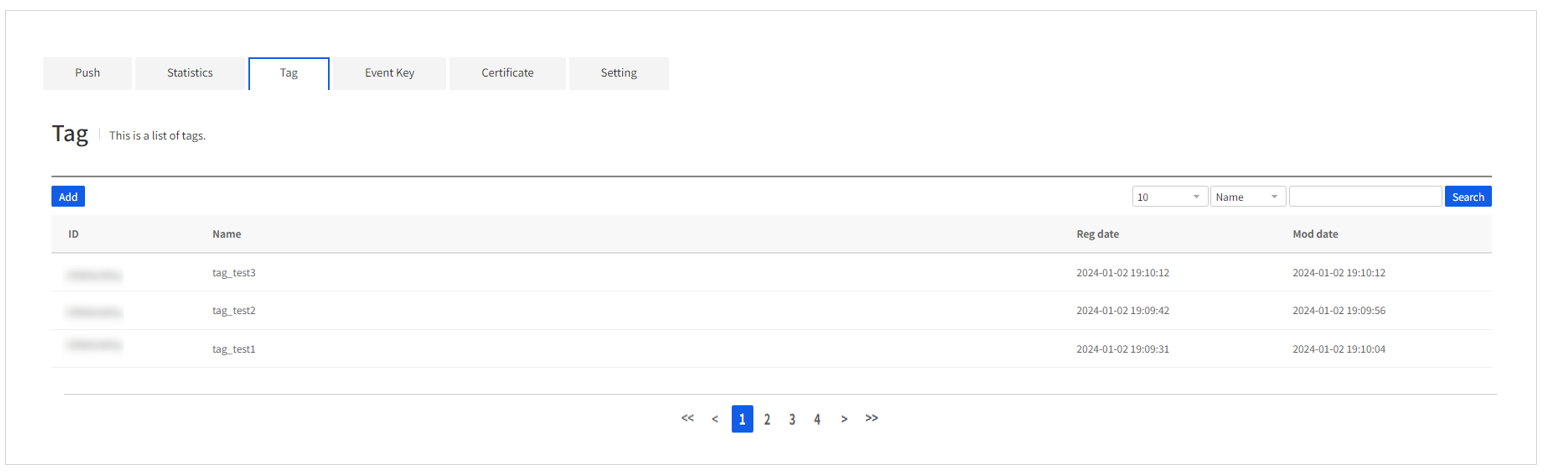
You can register a tag name to be used when sending push messages from NHN Cloud Push.
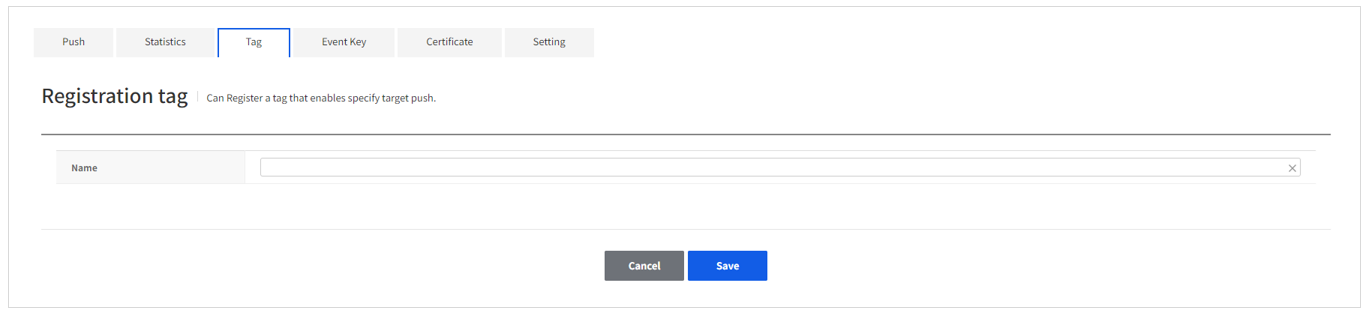
Tag register
Tag detail
You can manage the registered tags and manage the list of users registered in the tags.
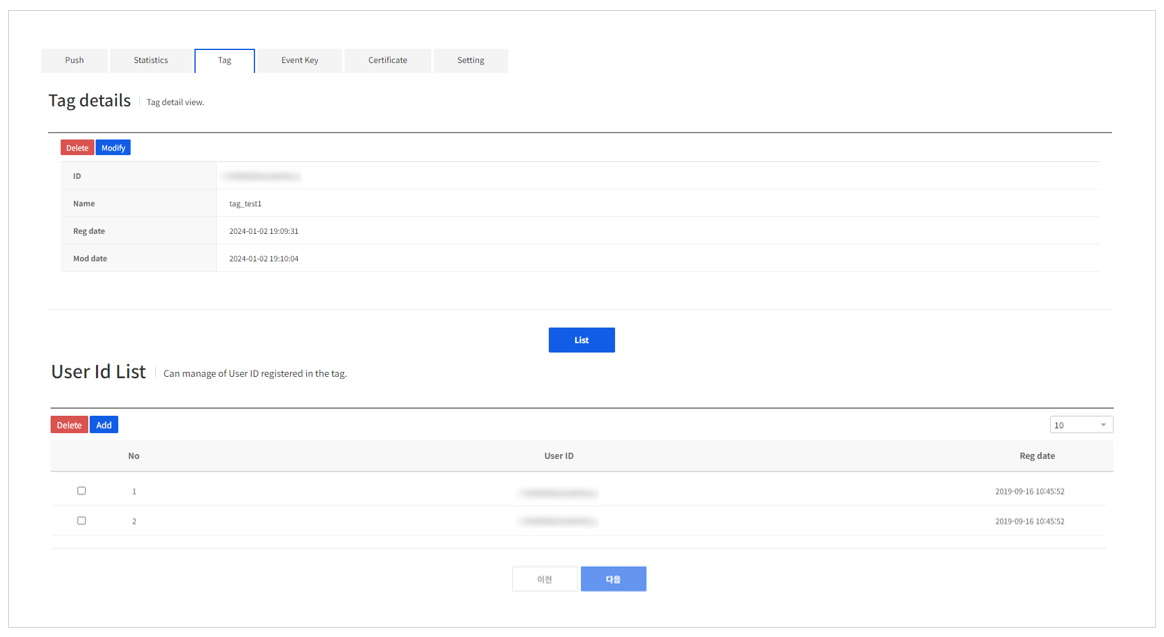
You can modify or delete tag information by clicking the Modify or Delete buttons at the top, and you can register or delete users in the tag using the user ID management function at the bottom.
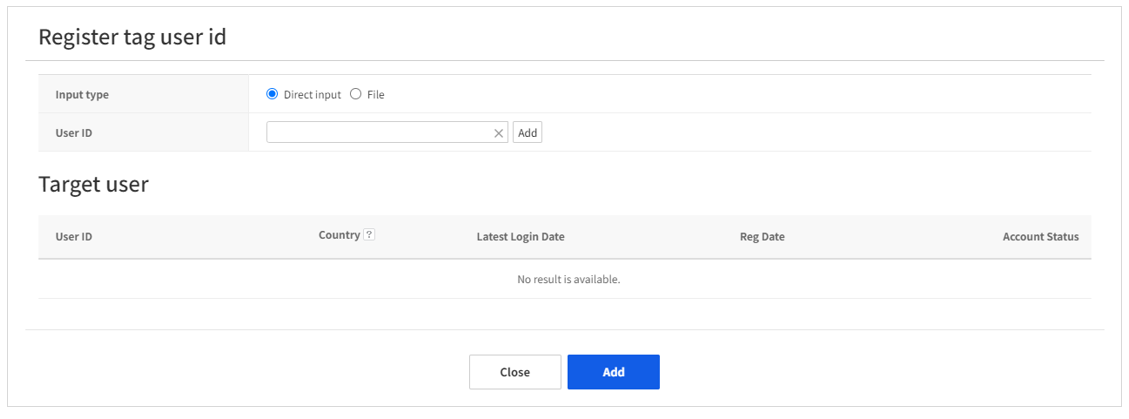
Add users
Add a single user
Add using a file
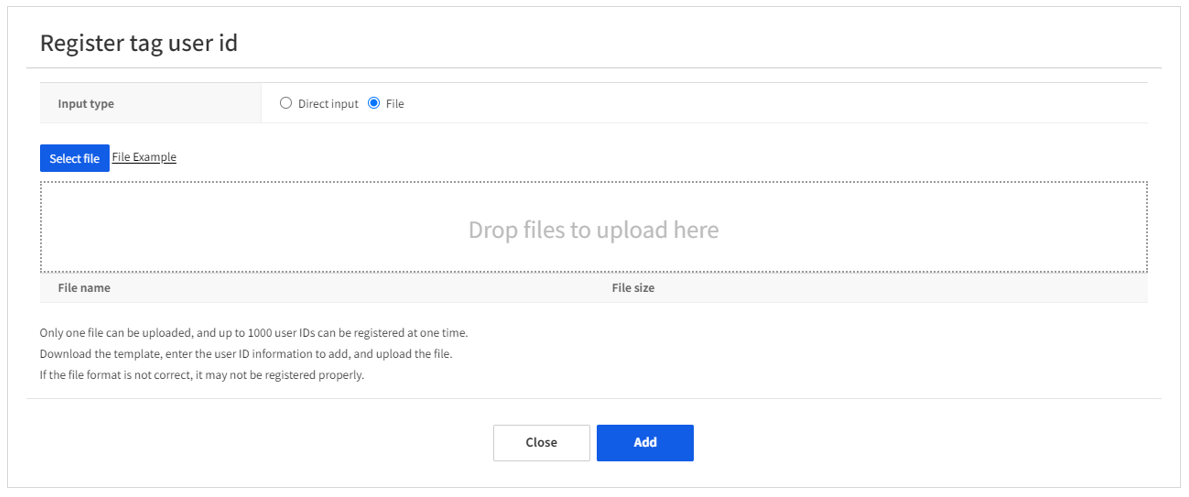
If you click the Add button, the registration popup appears as shown above, and you can input users by entering an ID directly or by registering a file.
File registration allows you to register up to 1,000 users at a time.
Delete users
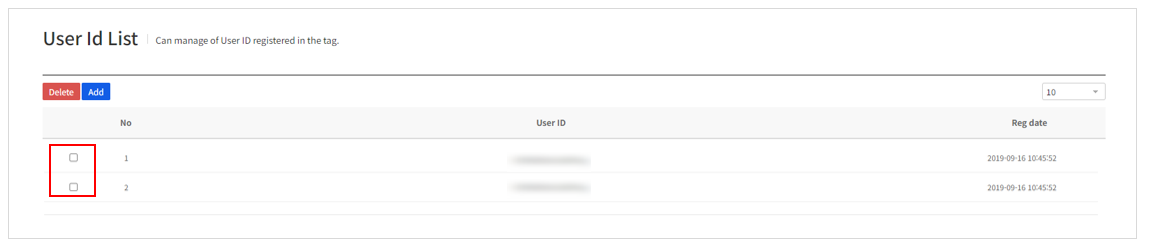
To delete a user registered in a tag, select the checkbox on the left in the user list and click the Delete button.
Setting
You can also manage the push settings
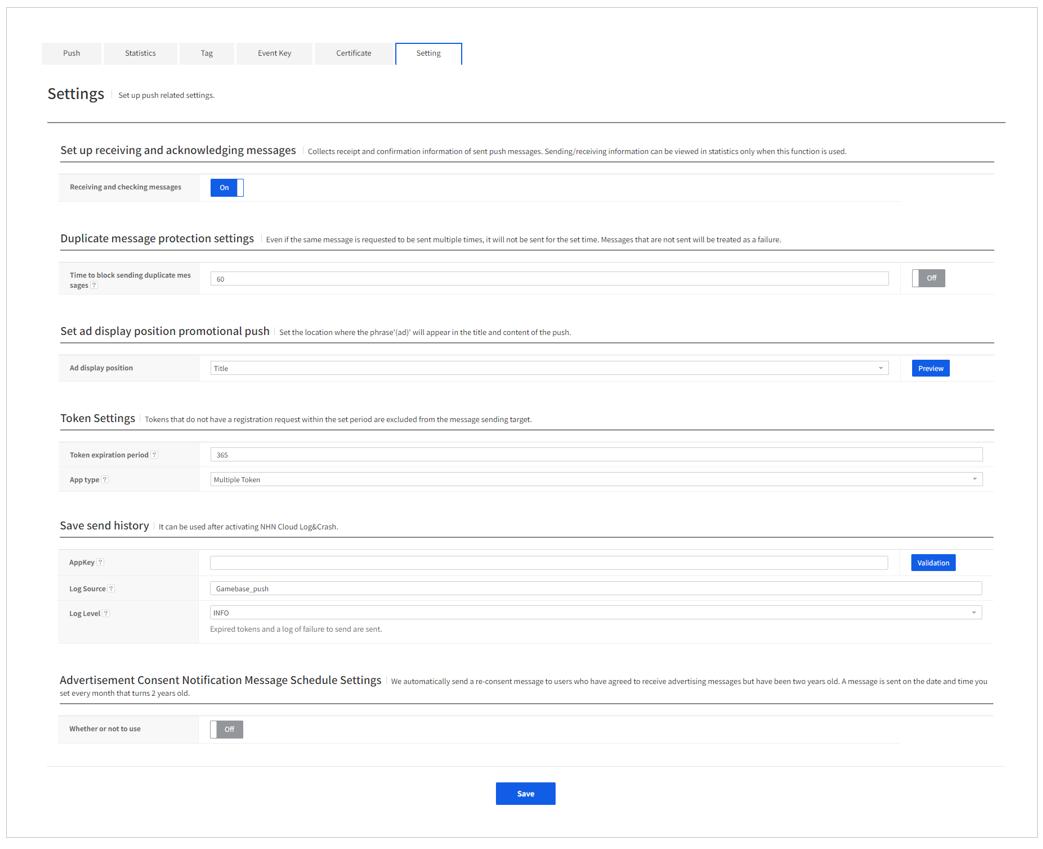
Settings for receiving and confirming the message
Function for collecting information about receiving and confirming the sent messages.
Settings for preventing duplicate messages
Function for preventing the identical messages from going out for the specified time even if they were sent out multiple times.
- You can set the time in minutes (1 - 60).
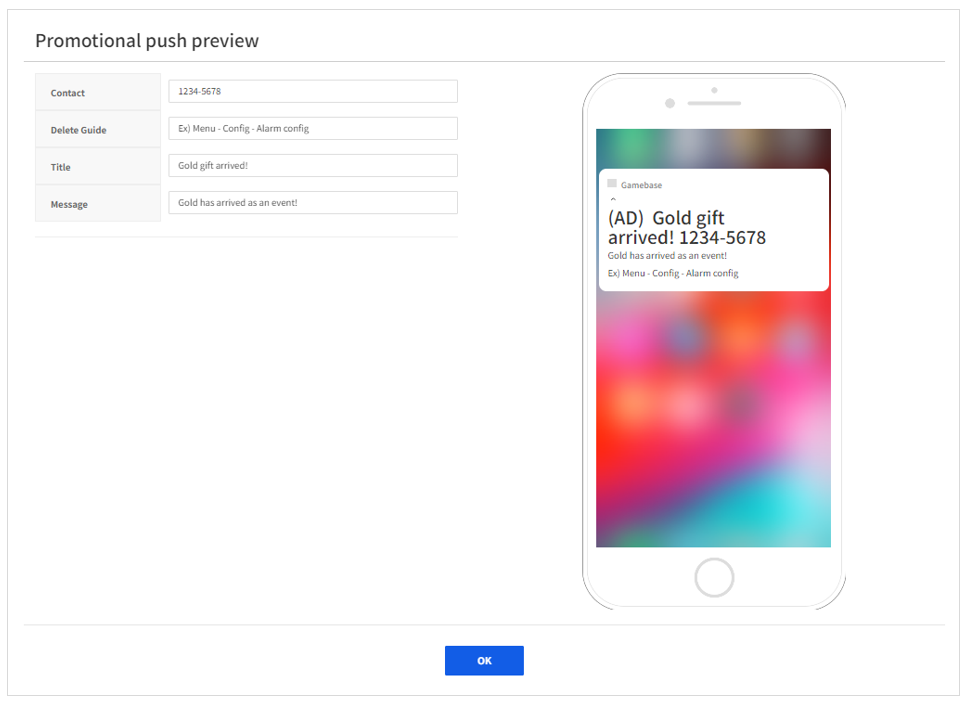
Settings for ad display text position
You can set the ad display position which appears when sending out an ad message.
- You can click the Preview button on the right to see the push example based on the ad display text that you specified.
Token settings
You can set the token expiration date and app type.
- Token expiration date: Can be set in days (1 - 730).
- App type
- Multiple tokens: UID(User ID) can have multiple tokens. This app can be used by a single user on multiple devices.
- Single token: UID can only have one token. This app can be used by a single user on a single device
Save outbound history
Saves the history of outbound messages in the NHN Cloud Log & Crash Search.
- AppKey: Log & Crash Search app key.
- Log Source: Uses the PUSH API provided by Gamebase to search the Log & Crash Search for the history on the pushes that have been sent out.
- Log Level: Level of logs to be sent to Log & Crash Search.
- ALL: All logs are sent to Log & Crash Search.
- INFO: Expired tokens and send failure logs are sent to Log & Crash Search.
- ERROR: Send failure logs are sent to Log & Crash Search.
Settings for reservation of guidance message for consent to receive advertisements
Automatically sends a re-consent message to users who agreed to receive advertising messages two years ago. A message is sent on the configured date and time every month that turns 2 years old. * Whether to use: Whether to use the reservation setting function for the guidance message of consent to receive advertisements. * Reservation date: The date to deliver the push message. If set to 3, the message will be sent on the 3rd of every month. * Reservation time: The time to deliver the push message. If you set the reservation date to 3 and the reservation time to 11, the message will be sent on the 3rd of every month at 11am. * Guidance message * Subject: You can set the subject of the push message. * Content: You can set the content of the push message. If you enter the date and time replace element (###AD_AGREEMENT_DATE_TIME###) for consent to receiving advertising messages in the body, it will be replaced with the date and time of consent for the corresponding token when sending the message. The content of the message must include the fact of consent, the date of consent, and how to maintain or withdraw the consent.
Table of Contents
- Game > Gamebase > Console Guide > Push
- Push
- Registered List
- Send History
- Register Push
- Statistics
- Outbound/Inbound
- Token registration
- Inbound settings
- Event Key
- Event Key register
- Event Key detail
- Authentication
- Authentication register
- Tag
- Tag register
- Tag detail
- Setting
- Settings for receiving and confirming the message
- Settings for preventing duplicate messages
- Settings for ad display text position
- Token settings
- Save outbound history
- Settings for reservation of guidance message for consent to receive advertisements